Hello Upcyclers and DIY-Doers!
Today I bring you my latest project, and I’m truly excited about the way it turned out! I found a plain baby changing table on Craigslist advertised for free. I picked it up from a lovely lady in West Seattle. This is what it looked like when I picked it up.
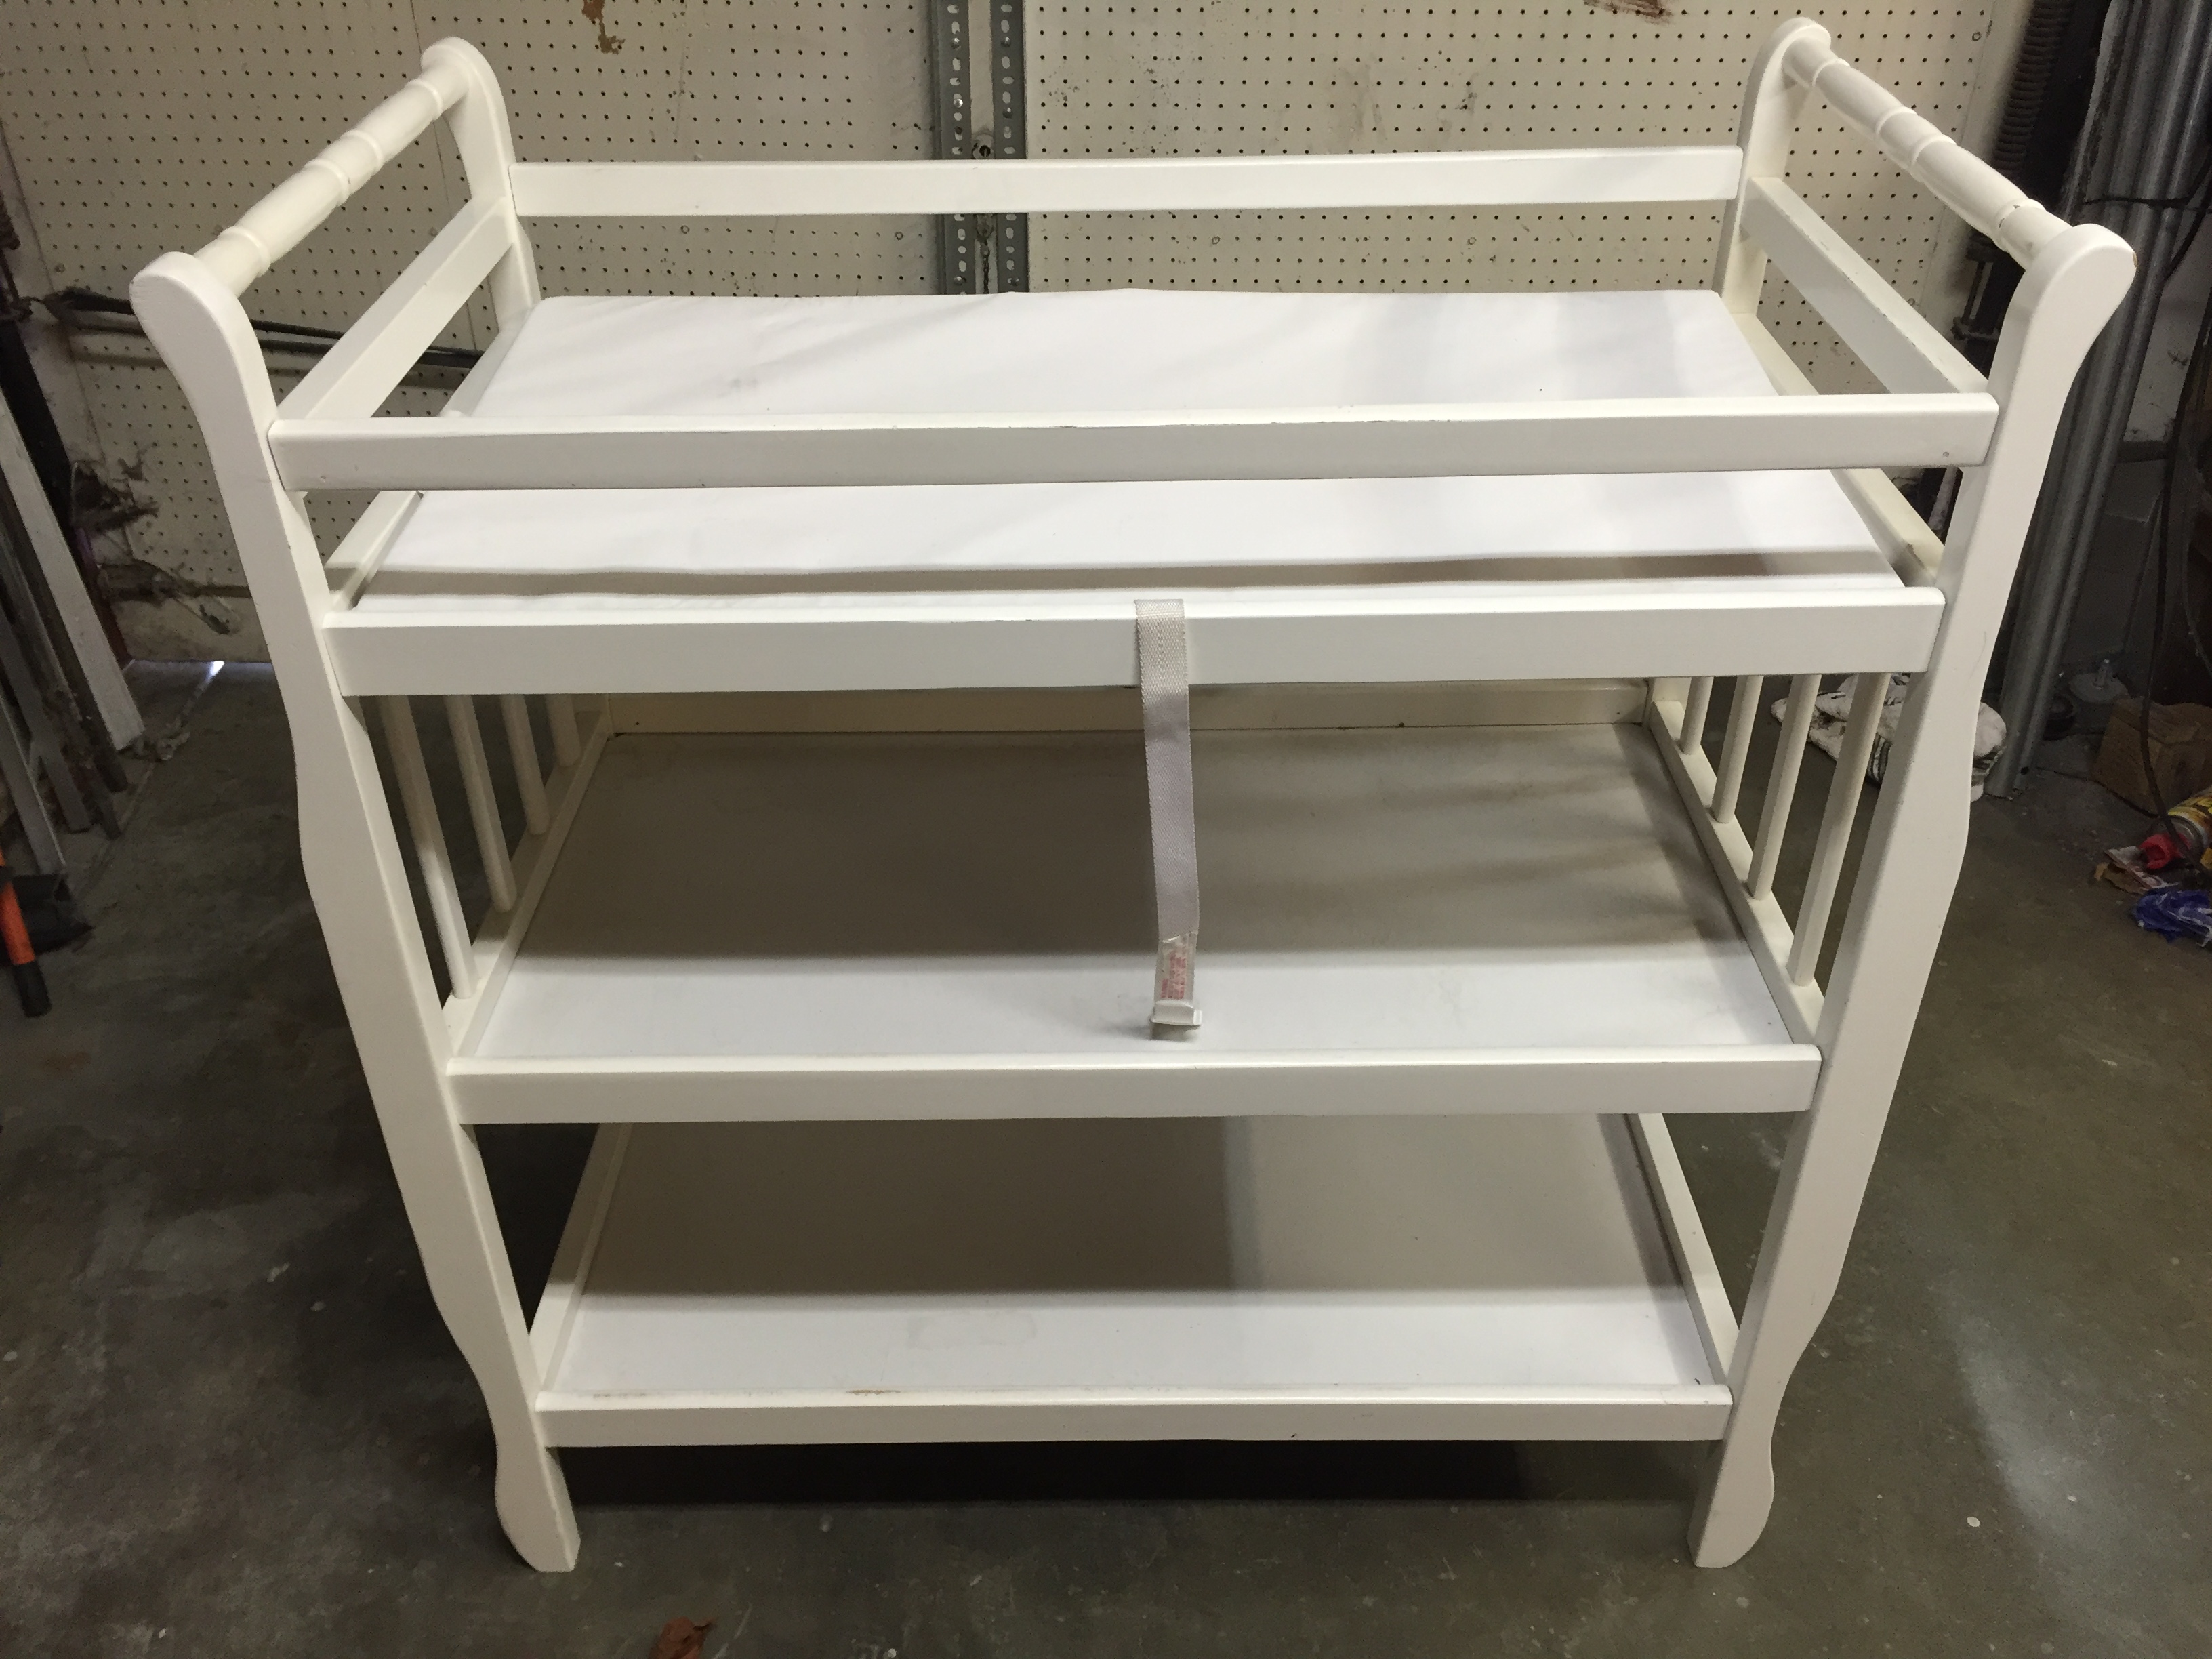
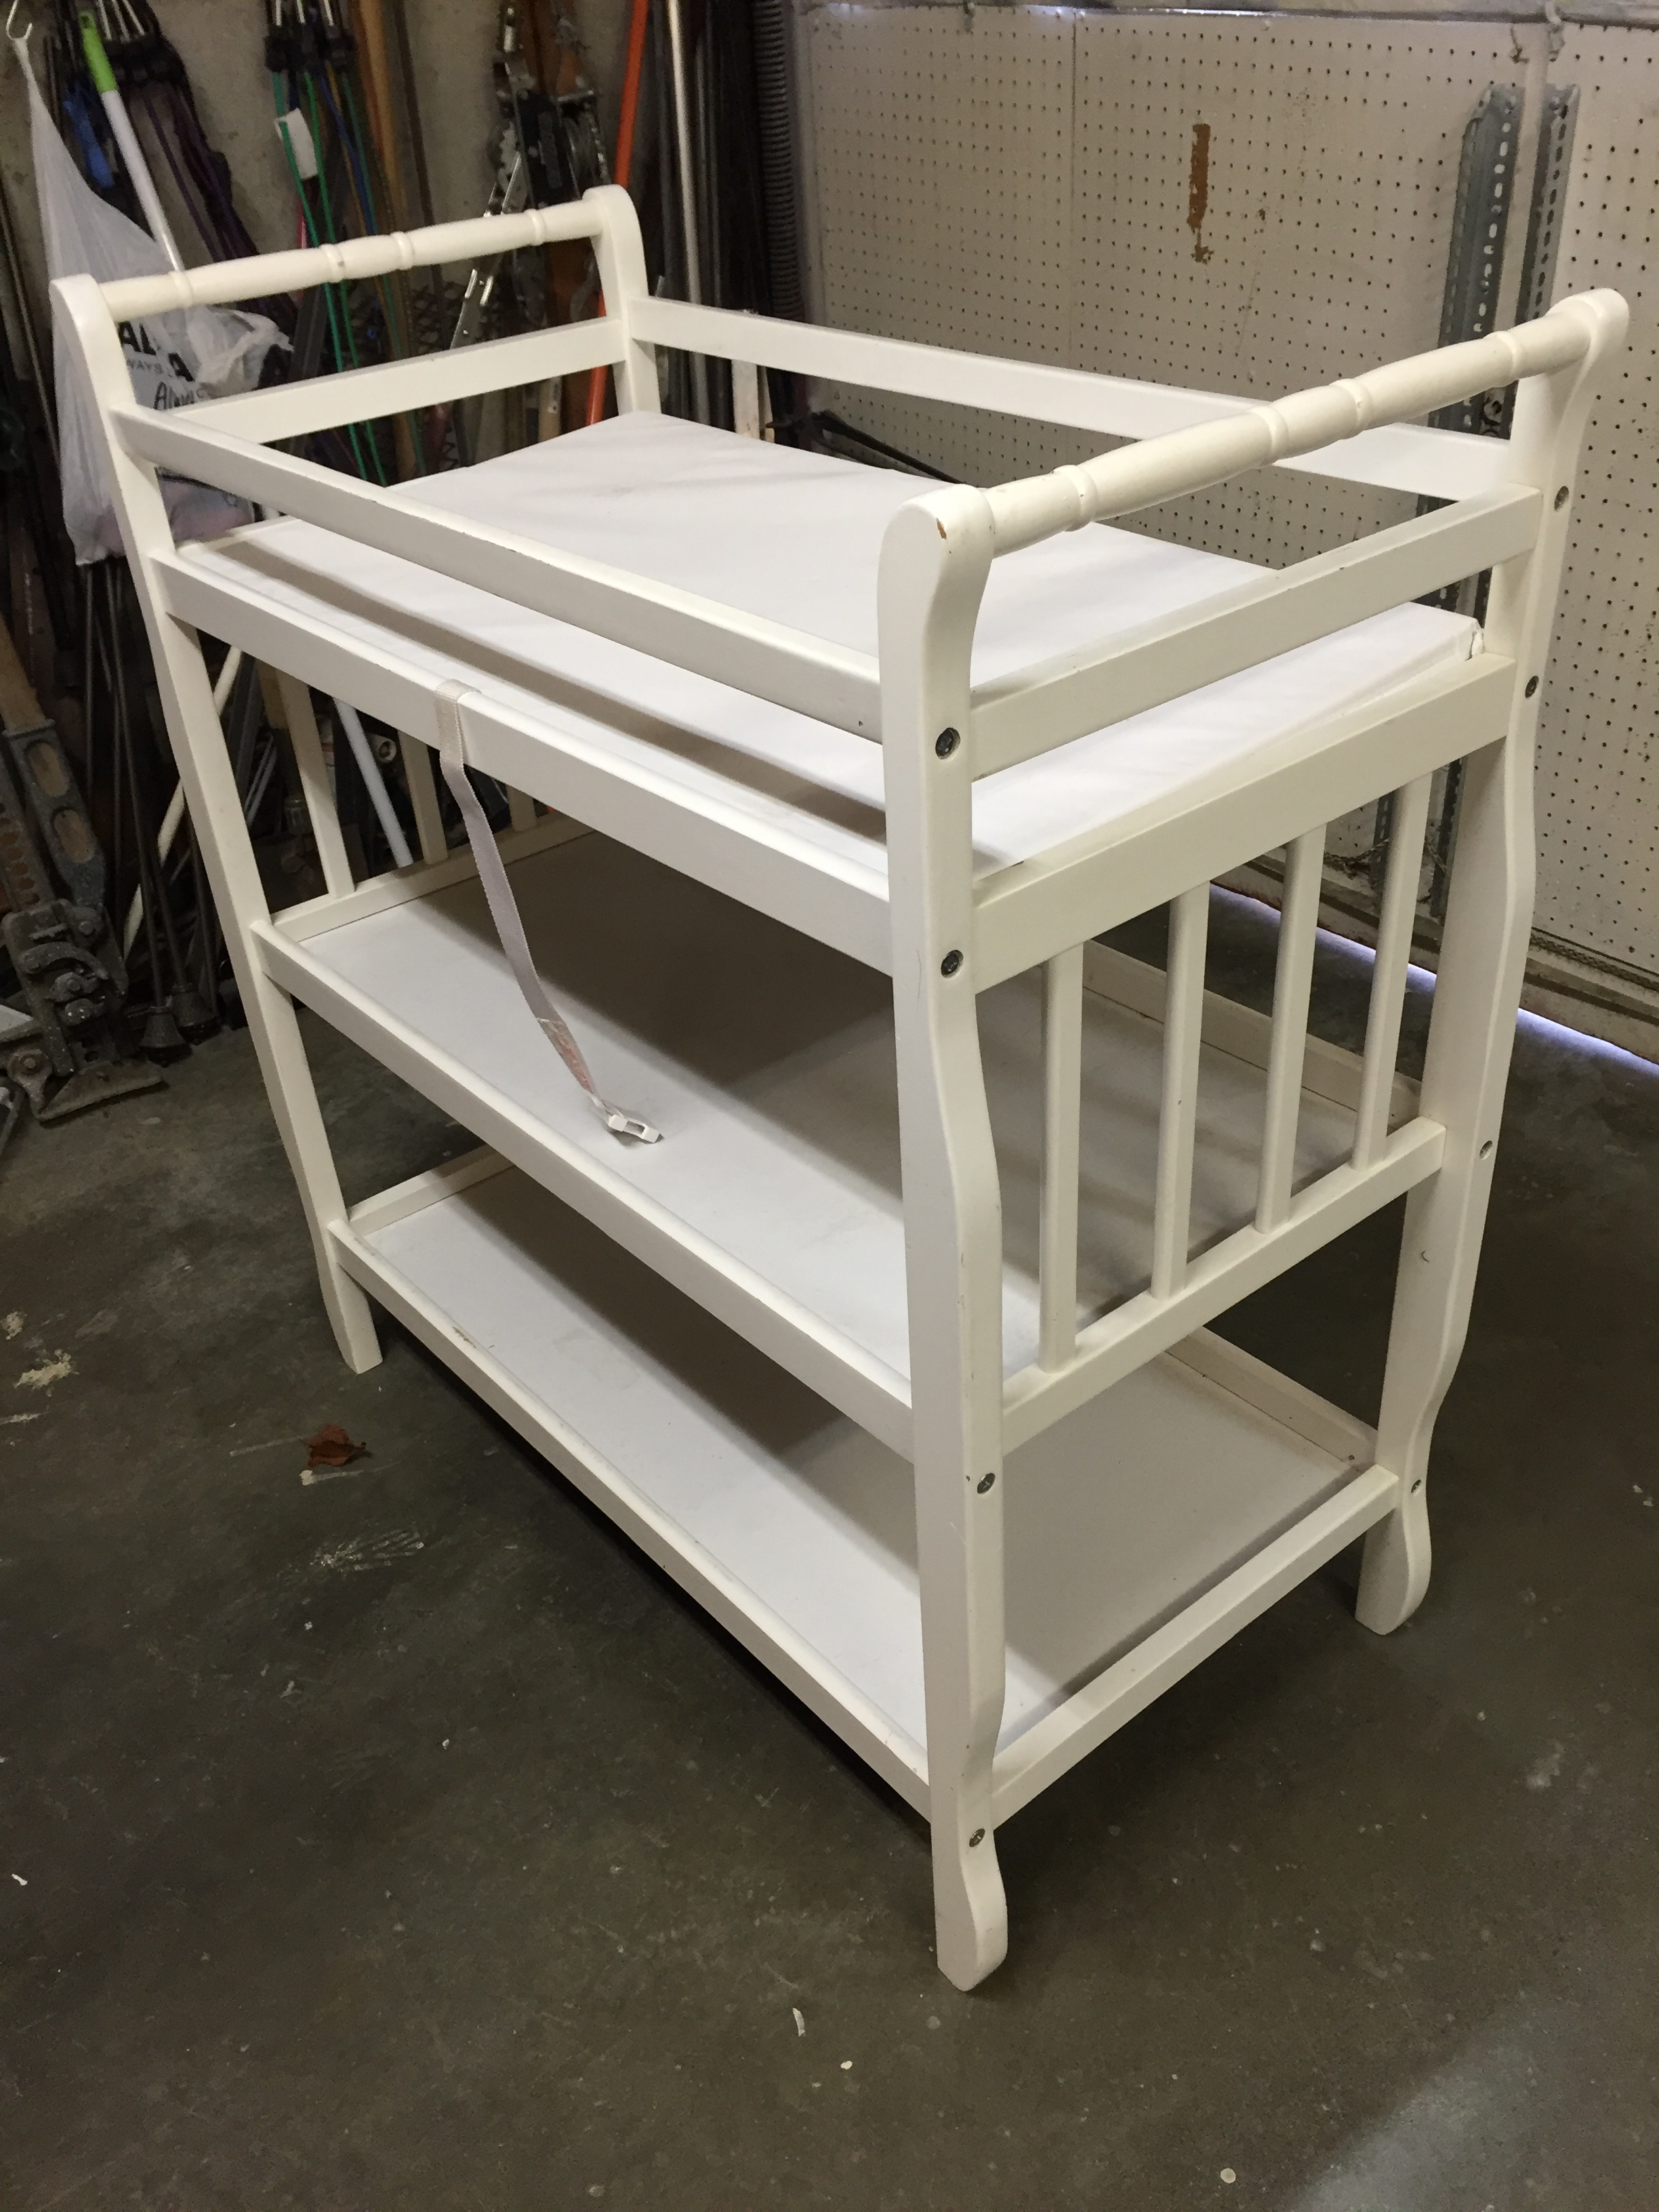
It was pretty plain and although you can’t really tell in these pictures….there were some truly unfortunate stains on it. Particularly the top shelf. I’m just going to go ahead and pretend they weren’t from pee or poop.
I also got pretty lucky by finding a screwdriver in my car….because there was no way it was going to fit in my hatchback. I definitely thought it was going to be smaller than it turned out to be.
LESSON #1: always come prepared to deconstruct something you buy.
Let’s get this DIY started!
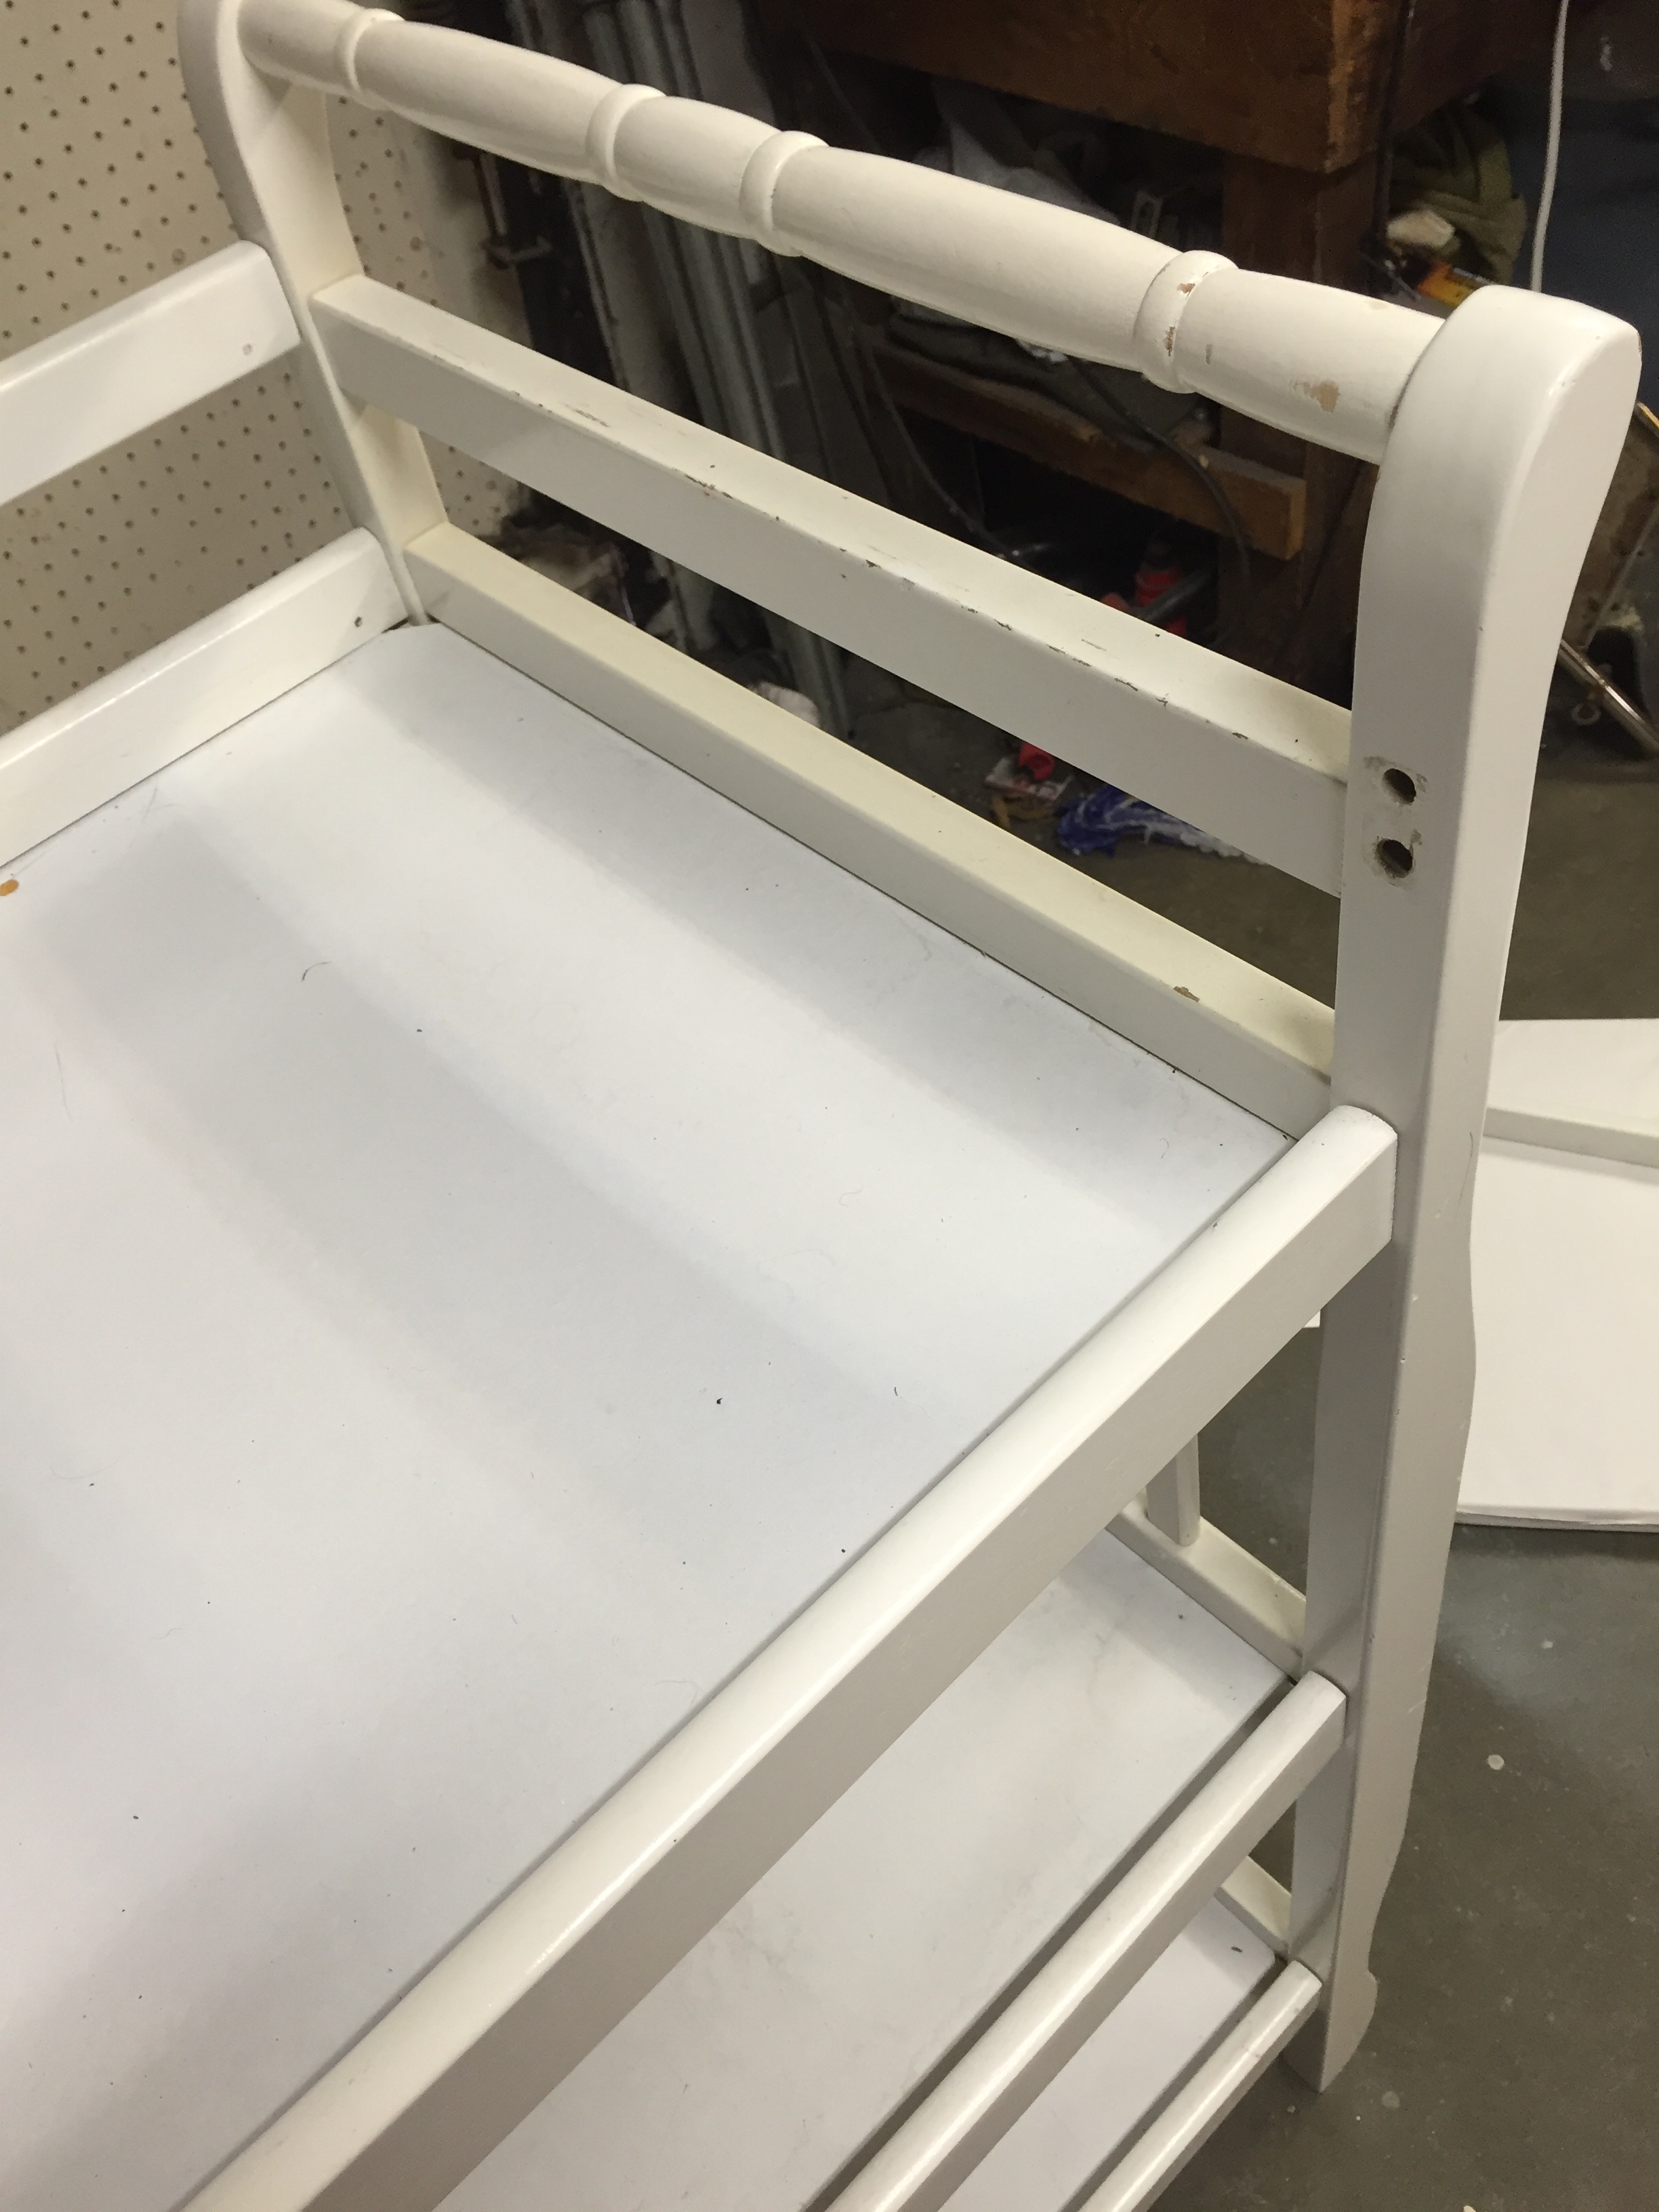


The first step in this conversion is to remove the changing pad that you will no longer need, and remove the screws holding in the front safety bar. This will get in the way of your bar, and might cause someone to spill if left in place. ESPECIALLY if someone has a bit too much… So we might as well take care of that while we’re ahead.
Next, we want to fill in those screw holes, in order to create a flawless and professional finish. For this, I used drywall mud left over from the never-ending remodel. Apply a small amount to a metal or plastic putty knife and smooth it into the screw holes. Then rotate the knife 90 degrees and scrape away the extra. Do this a couple times in different directions until the entire hole is filled with mud. Then let it dry over night.
Drywall mud will shrink as it dries. So you might need to do this a few times until it is perfect.
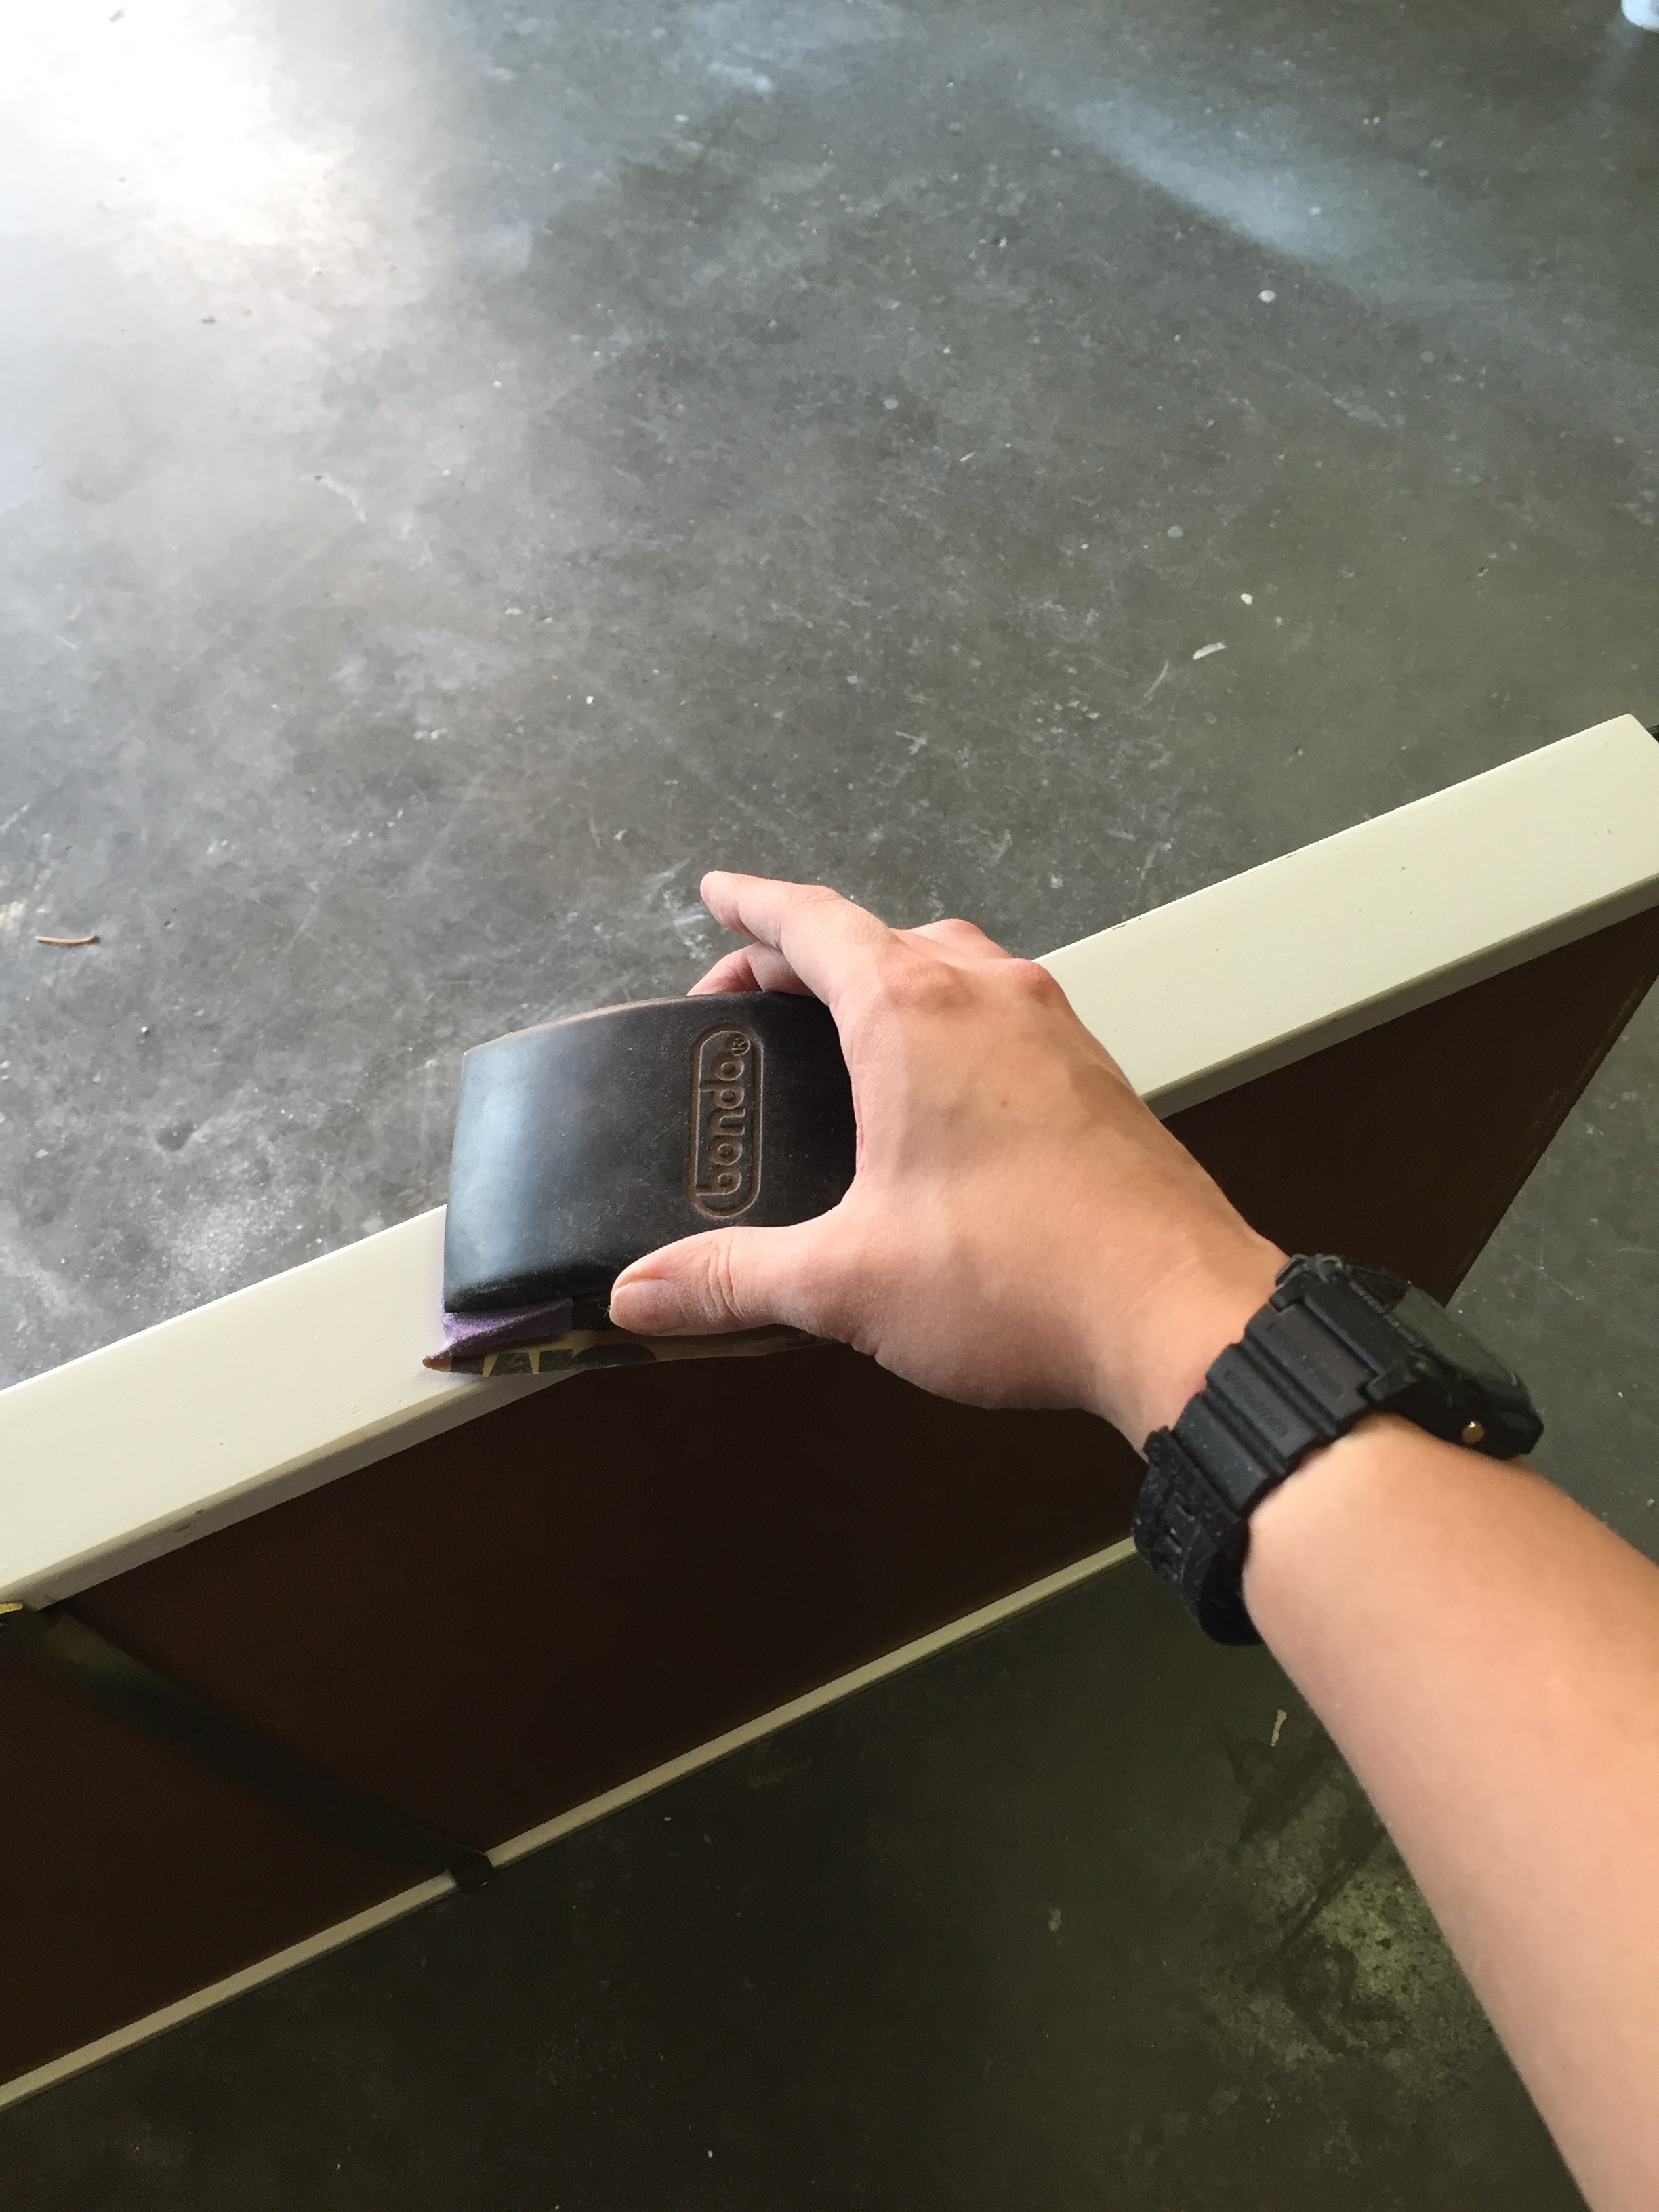
Once the mud is completely dry, it’s time to take the changing table apart and give the entire surface a good sanding. I used 100 grade sand paper and a sanding block seen above. You only want to sand until the mud is smooth, and you’ve removed the shininess of the paint. Then wipe the entire piece down with a damp cloth to remove all the dust.
NOTE: Wearing a dust mask during this is beneficial to your health!
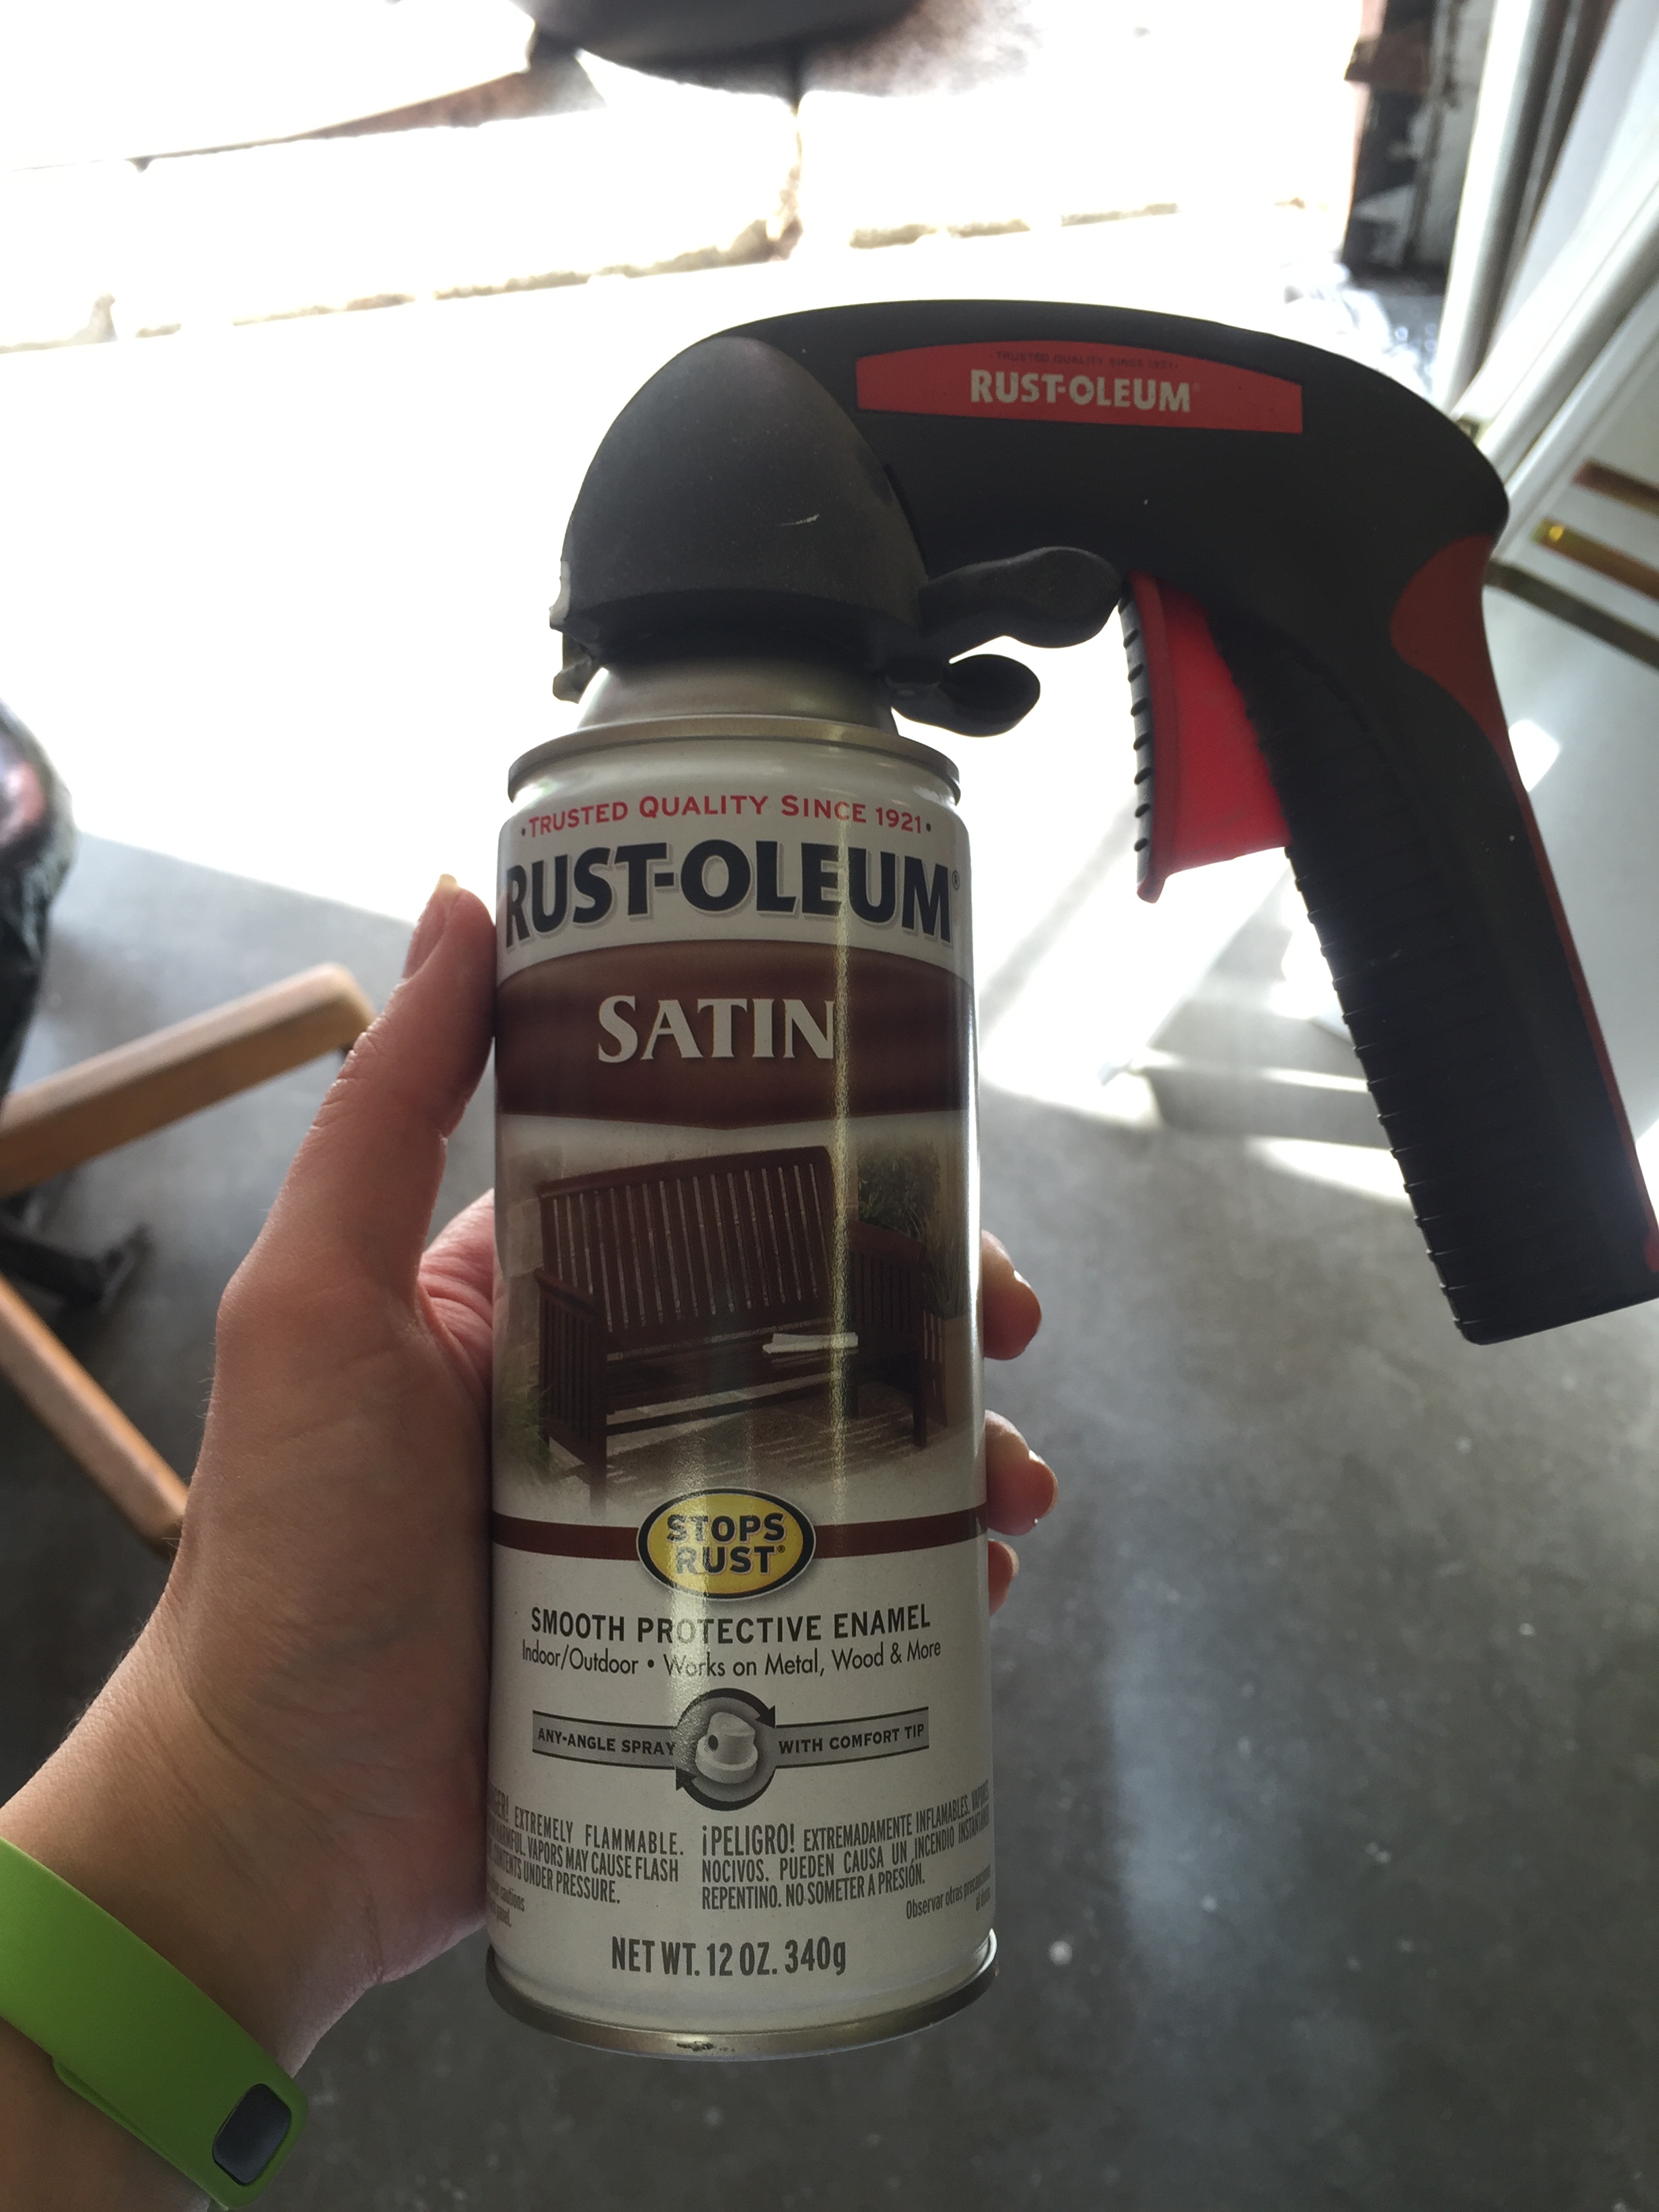

Next, you can start painting the pieces of the changing table. I chose to use the satin spray paint seen above, in the color black. This I found as Home Depot for $3.79 and I ended up needing about 2 and a half cans for the entire project. So, try to get that all at once….instead of three trips like I did. If you buy too much, you can always return any unused cans. I painted every piece of the changing table this color EXCEPT the bottom of the shelves.
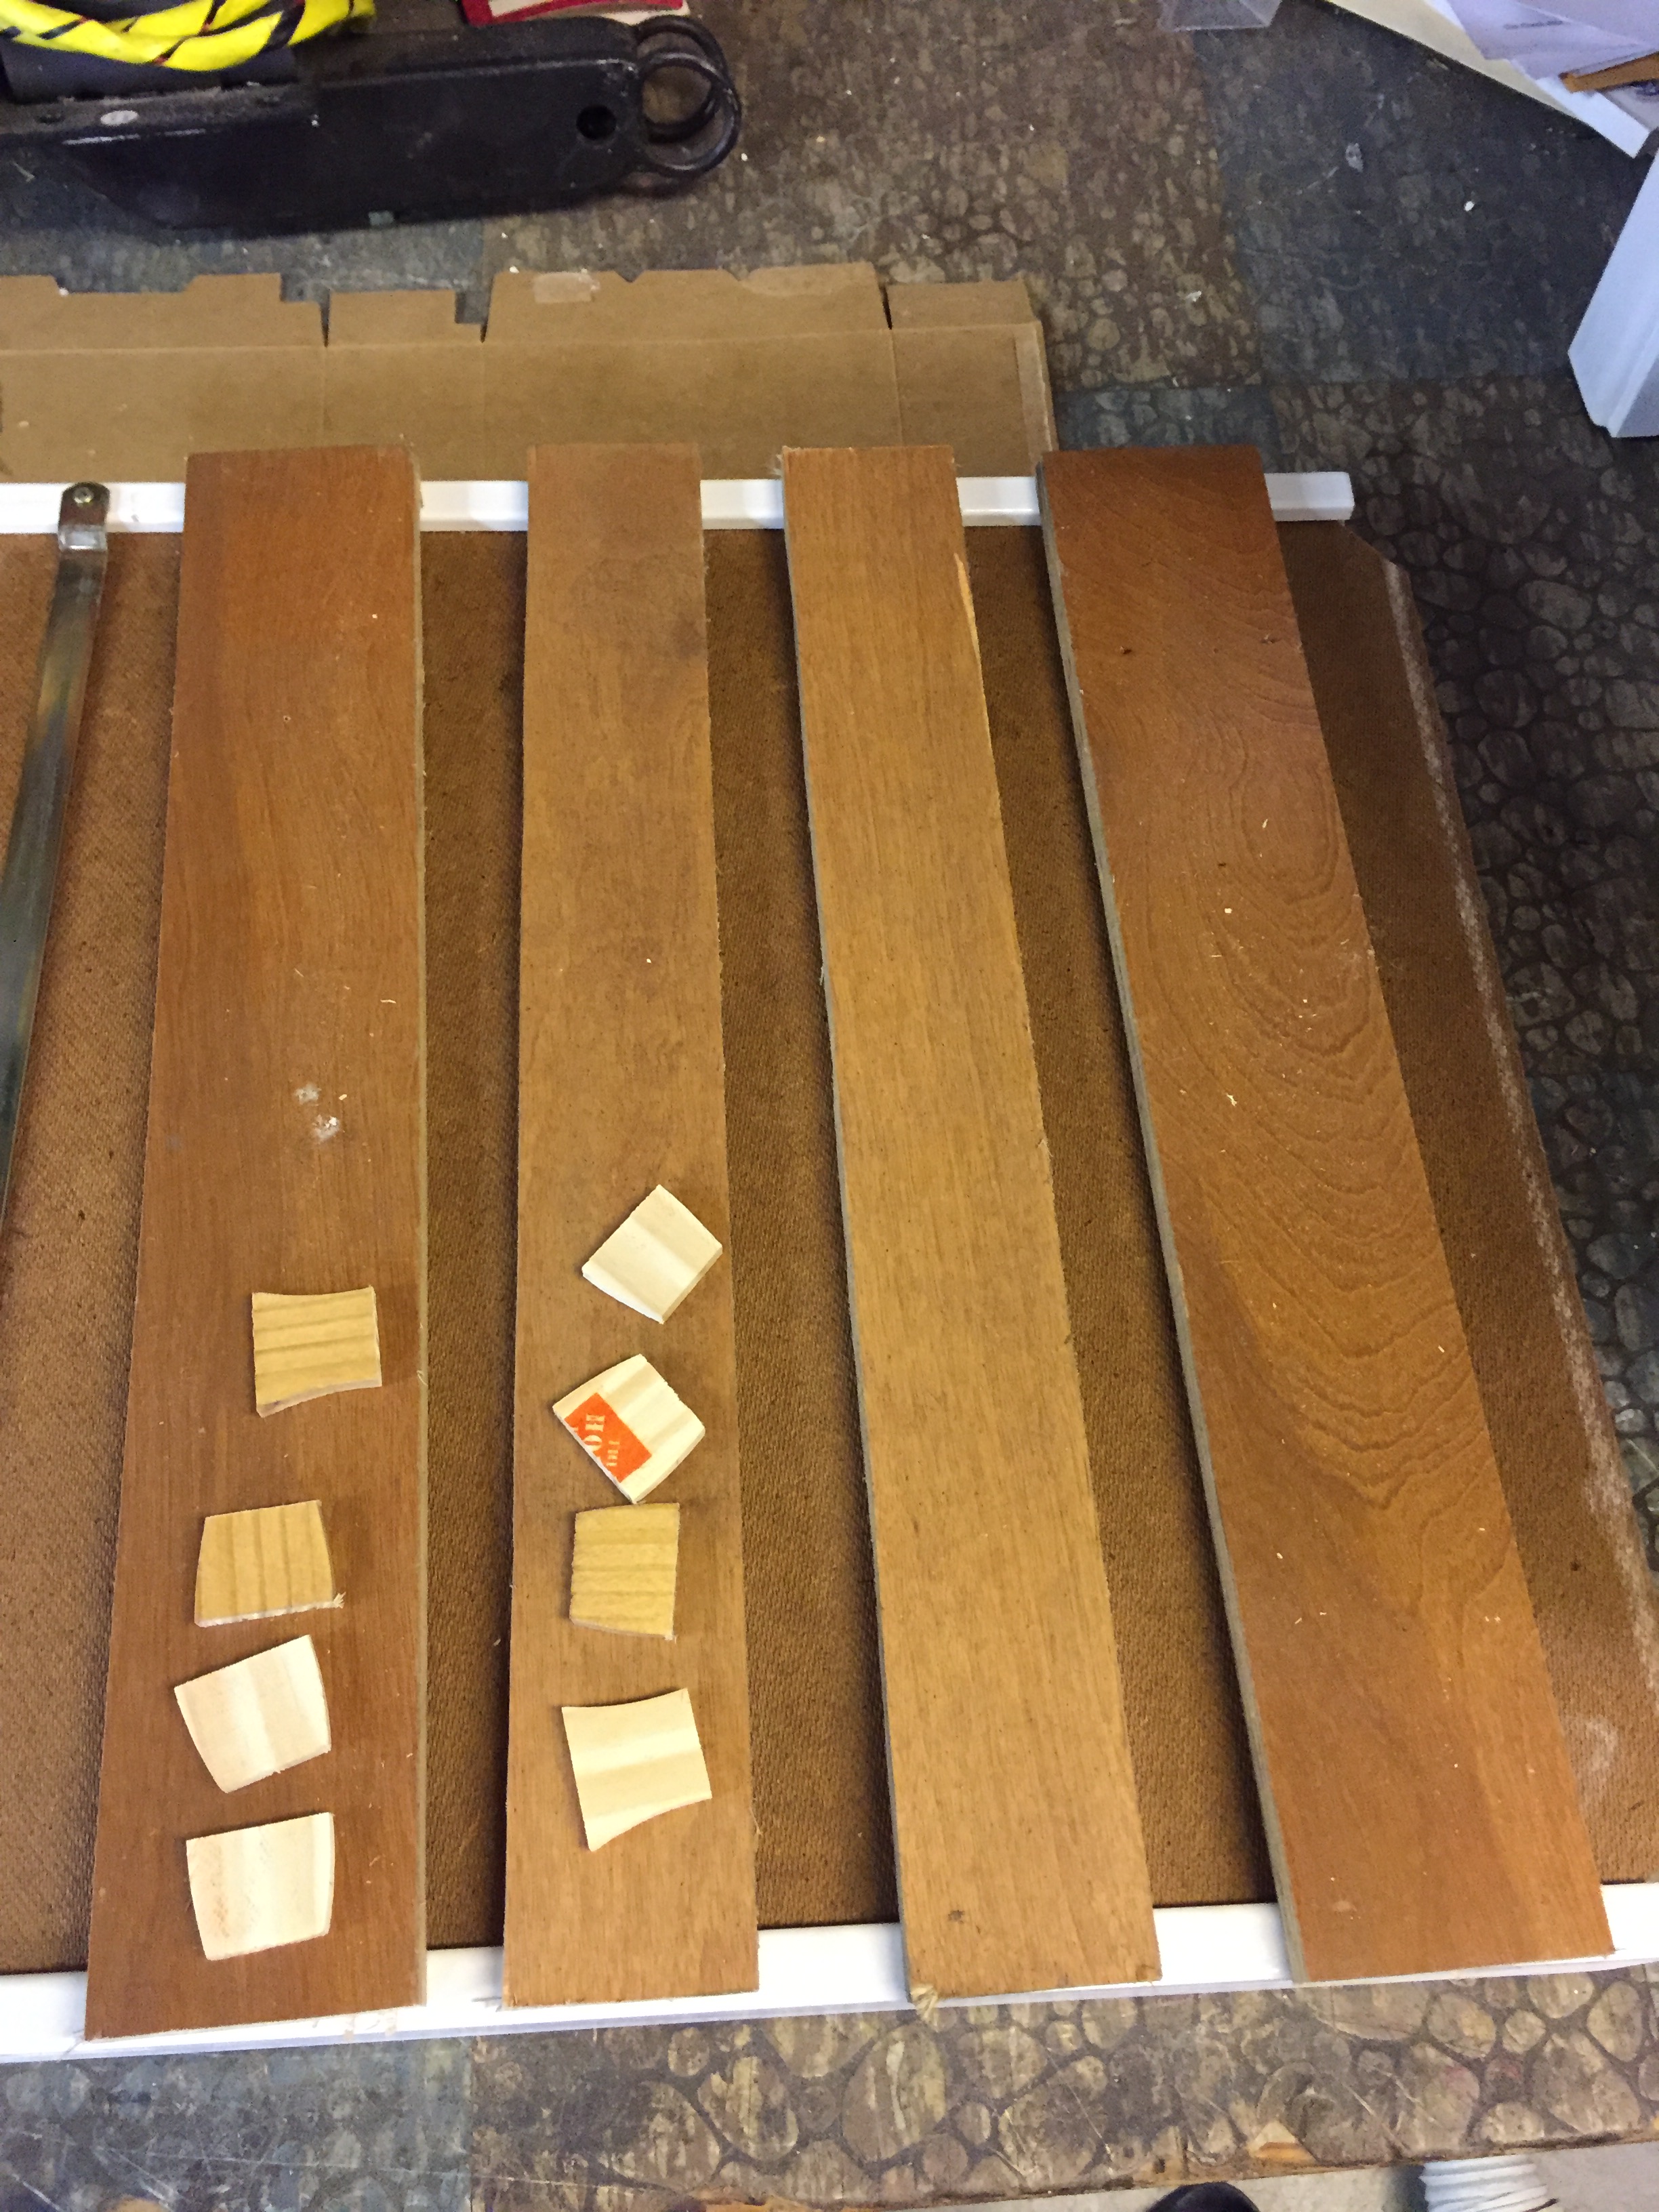
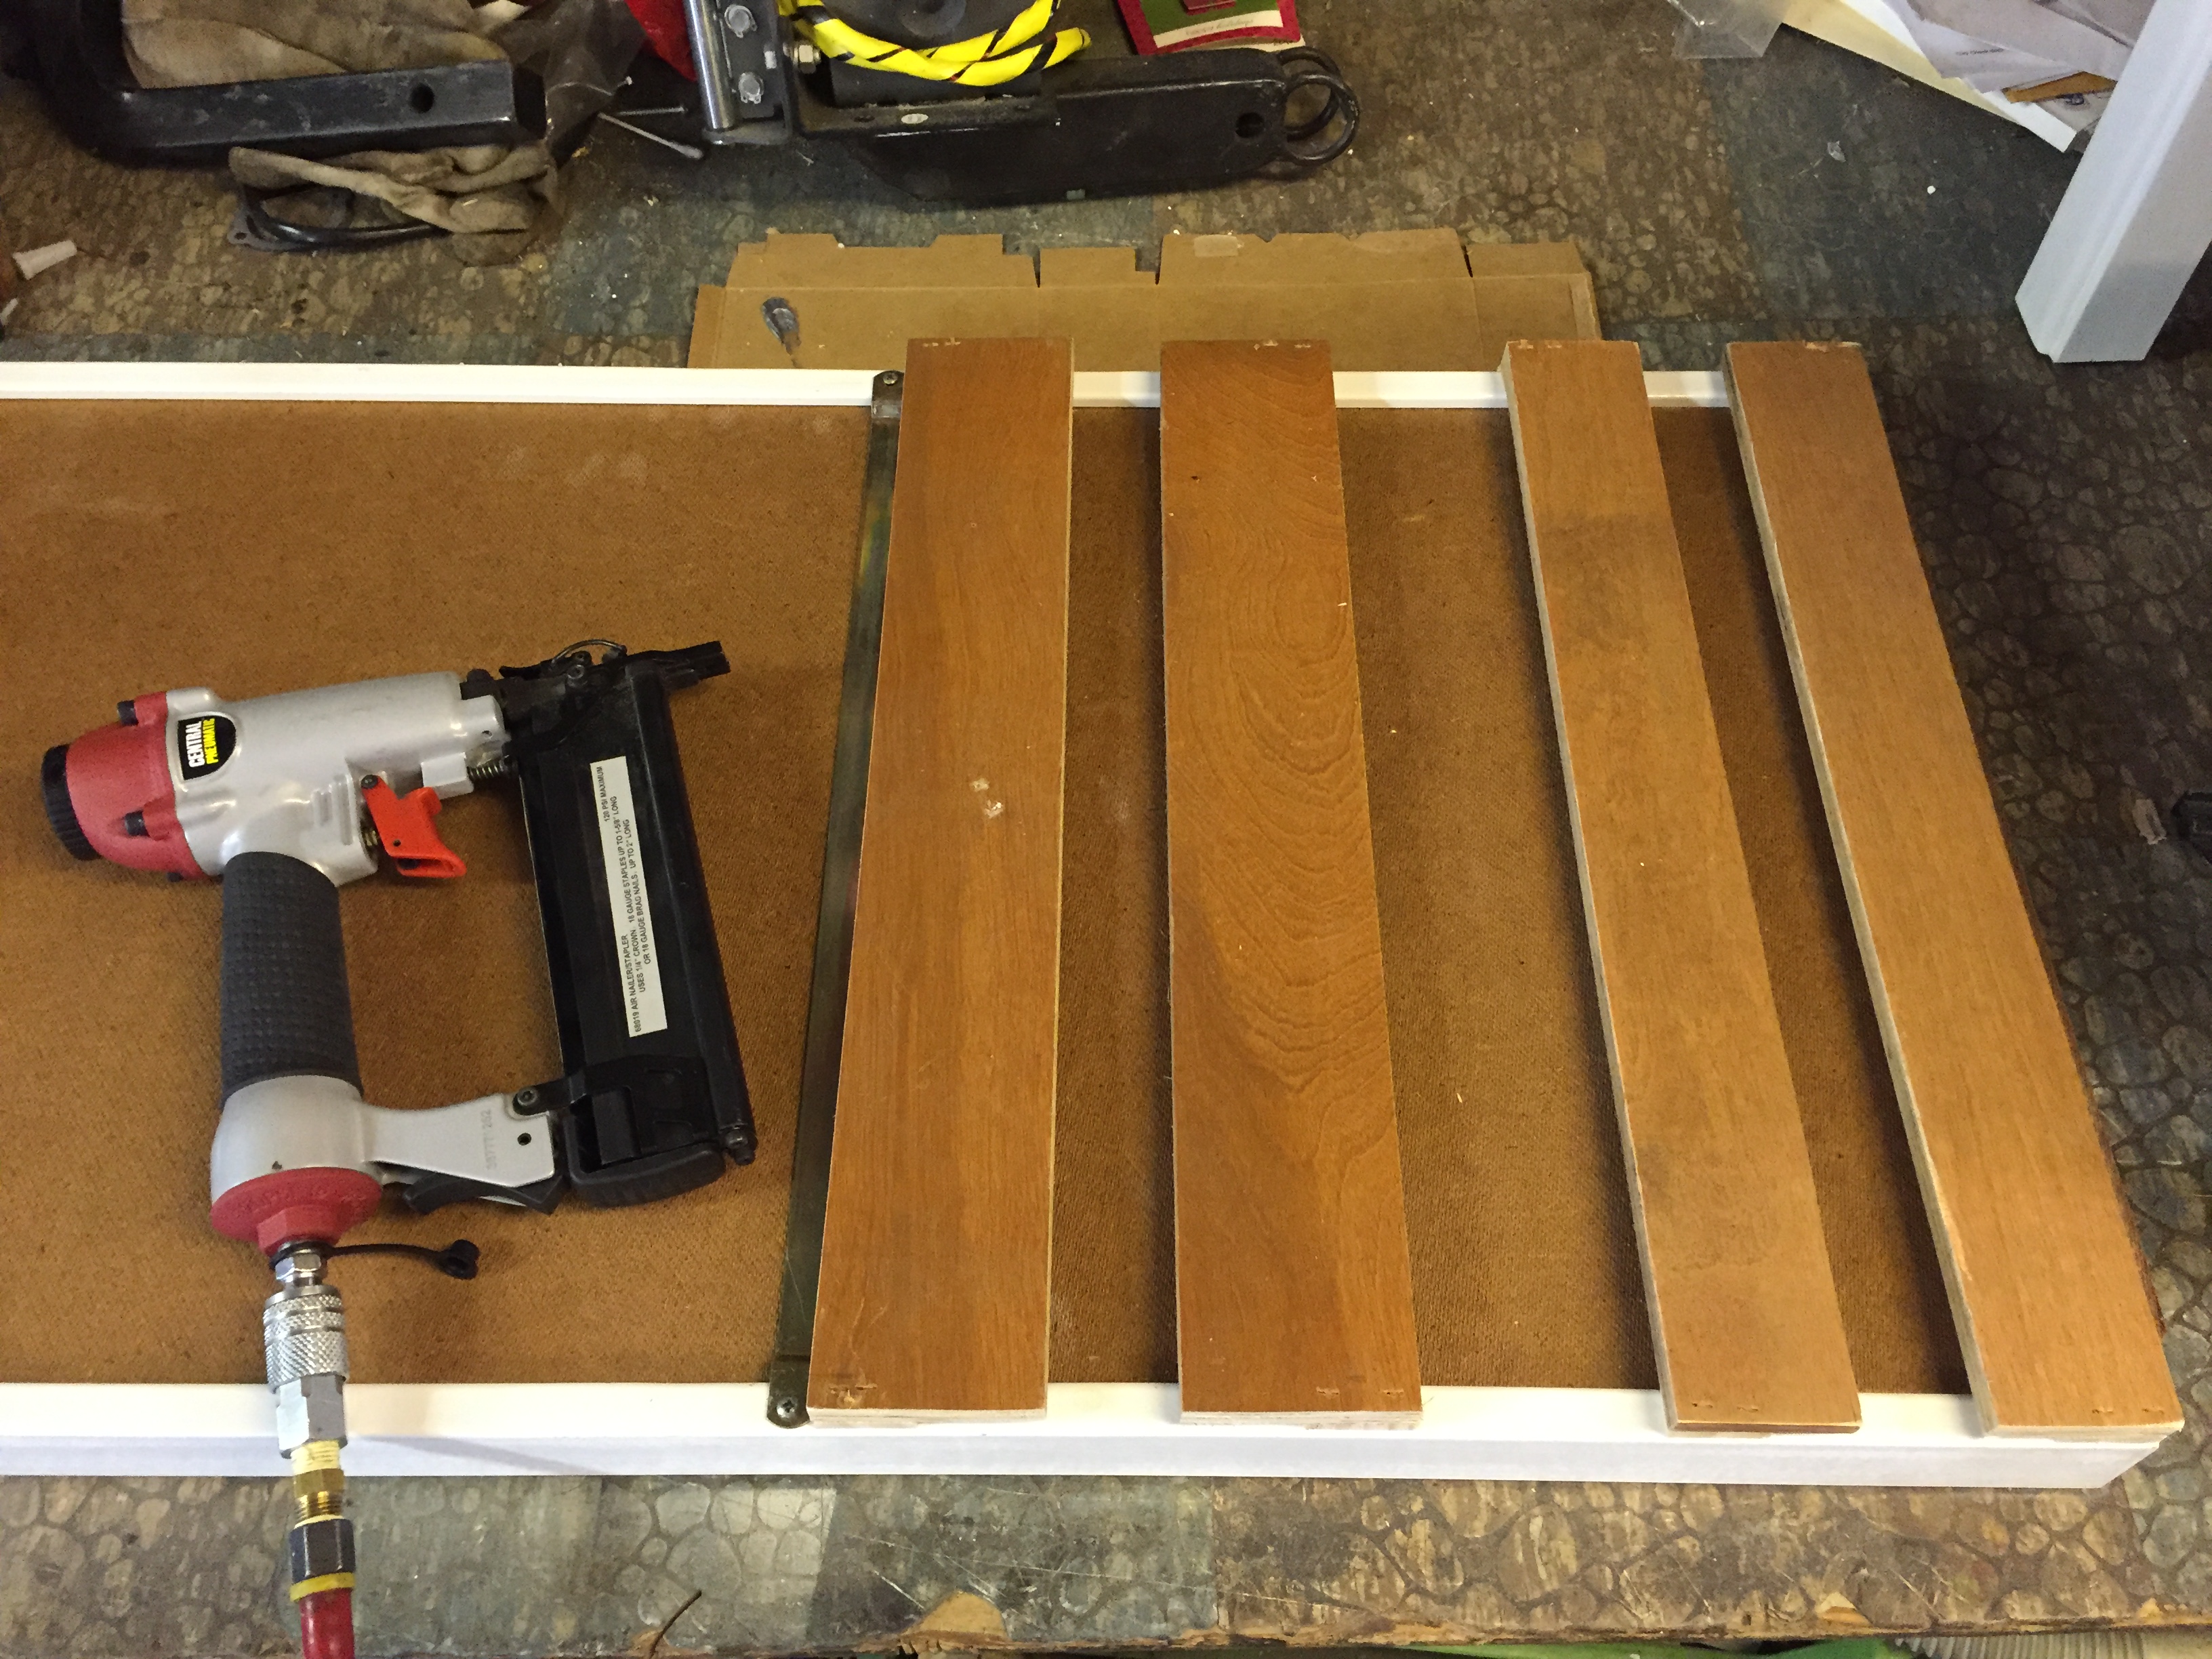
While your first coat of paint is drying, You can add a stemmed-glass rack to hold your wine and martini glasses upside down from the underside of the top shelf. For this, I used some flooring boards from my dad’s wood pile, and the left over pieces of stir sticks from an earlier project (SEE THAT HERE). I cut the floor boards (4) the exact depth of the shelf. Then i cut the remaining pieces of stir sticks into 1.5 inch “squares.” I decided these didn’t need to be perfect….because it was the perfect size, and I figured they would be hidden. Which I was right about!
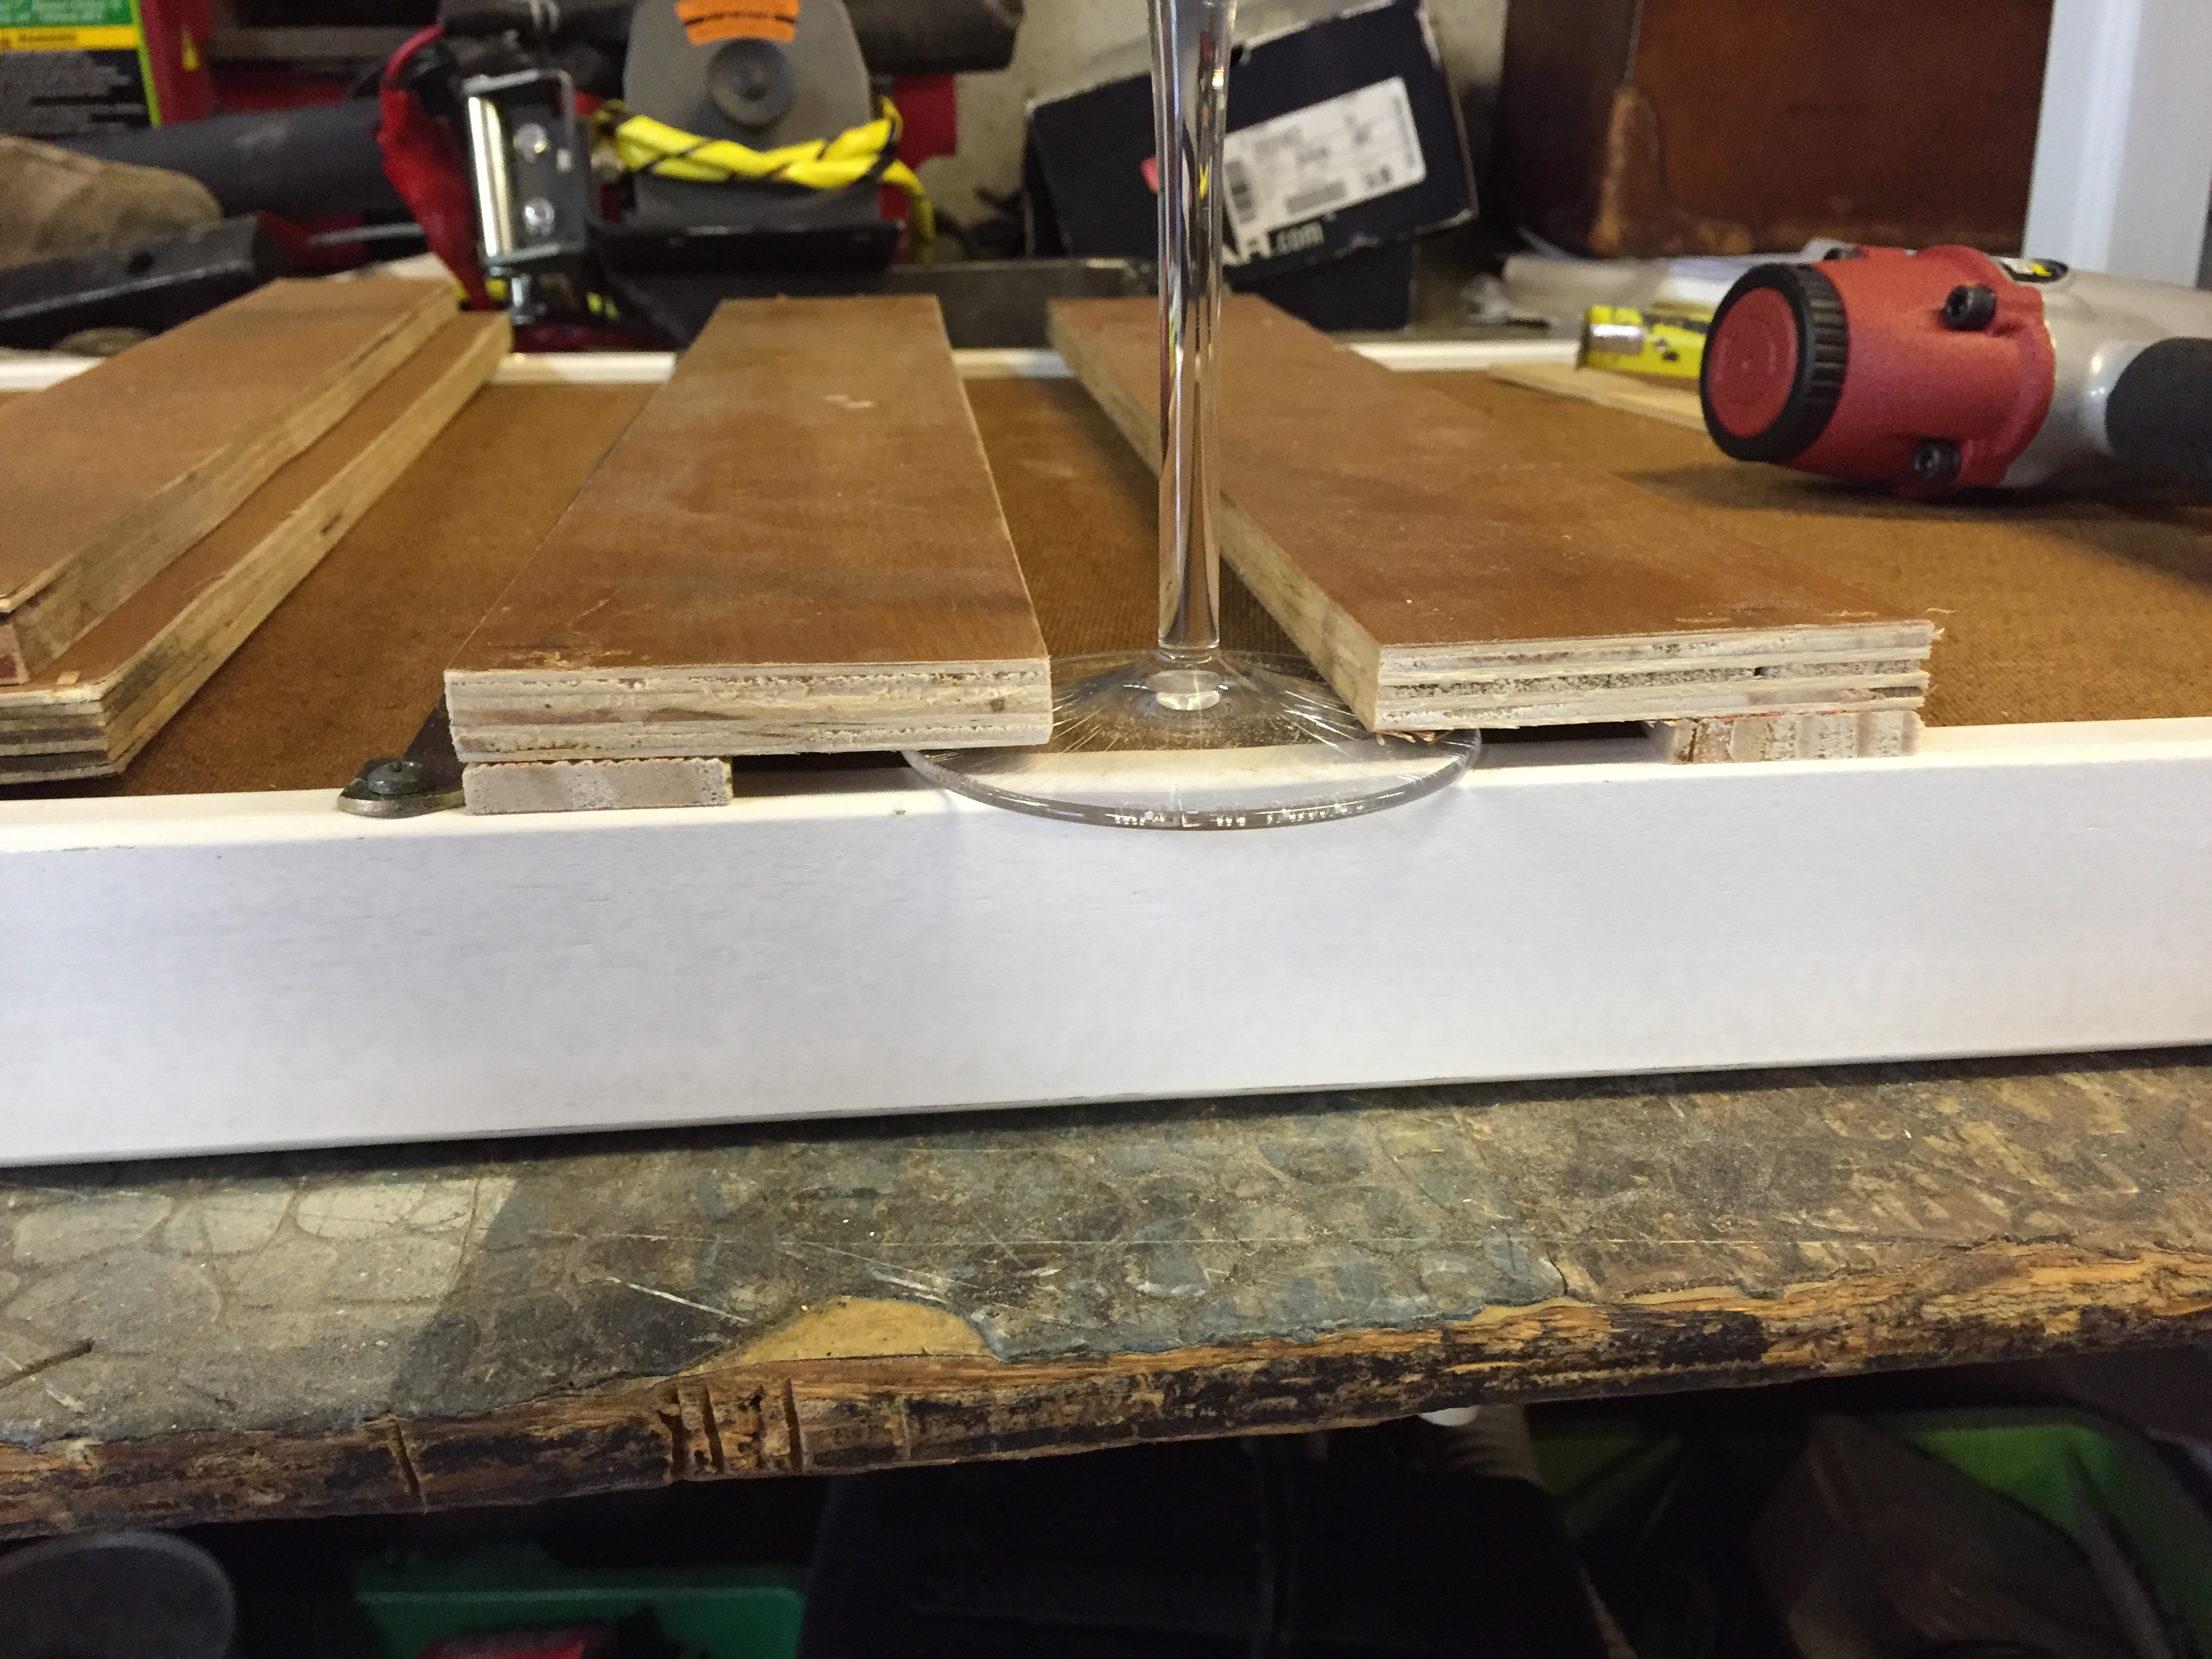
Place a piece of stir stick under each floor board, as seen above. Allow for enough room for one of your glasses to slide in and out smoothly. Then, use a nail gun to secure them into place. I used 1.5 inch nails, with the air compressor set to 60. I put two nails in each strip, making sure to allow room for the bottom board of the shelf to slide in and out, as it is supposed to.
NOTE: If you do not know how to use a nail gun, please seek help from someone who does.

Then, you can paint the rest of the pieces. The bottom of the shelves received two coats of this grey color, and I needed two whole cans for this. The shelves were a lot bigger than I anticipated, and needed a lot of paint. Make sure to allow ample drying time in between layers of paint. At least an hour. This is also a good time to finish painting the rest of the changing table black. I painted one side of ever piece, then once they were dry, I painted the other side.
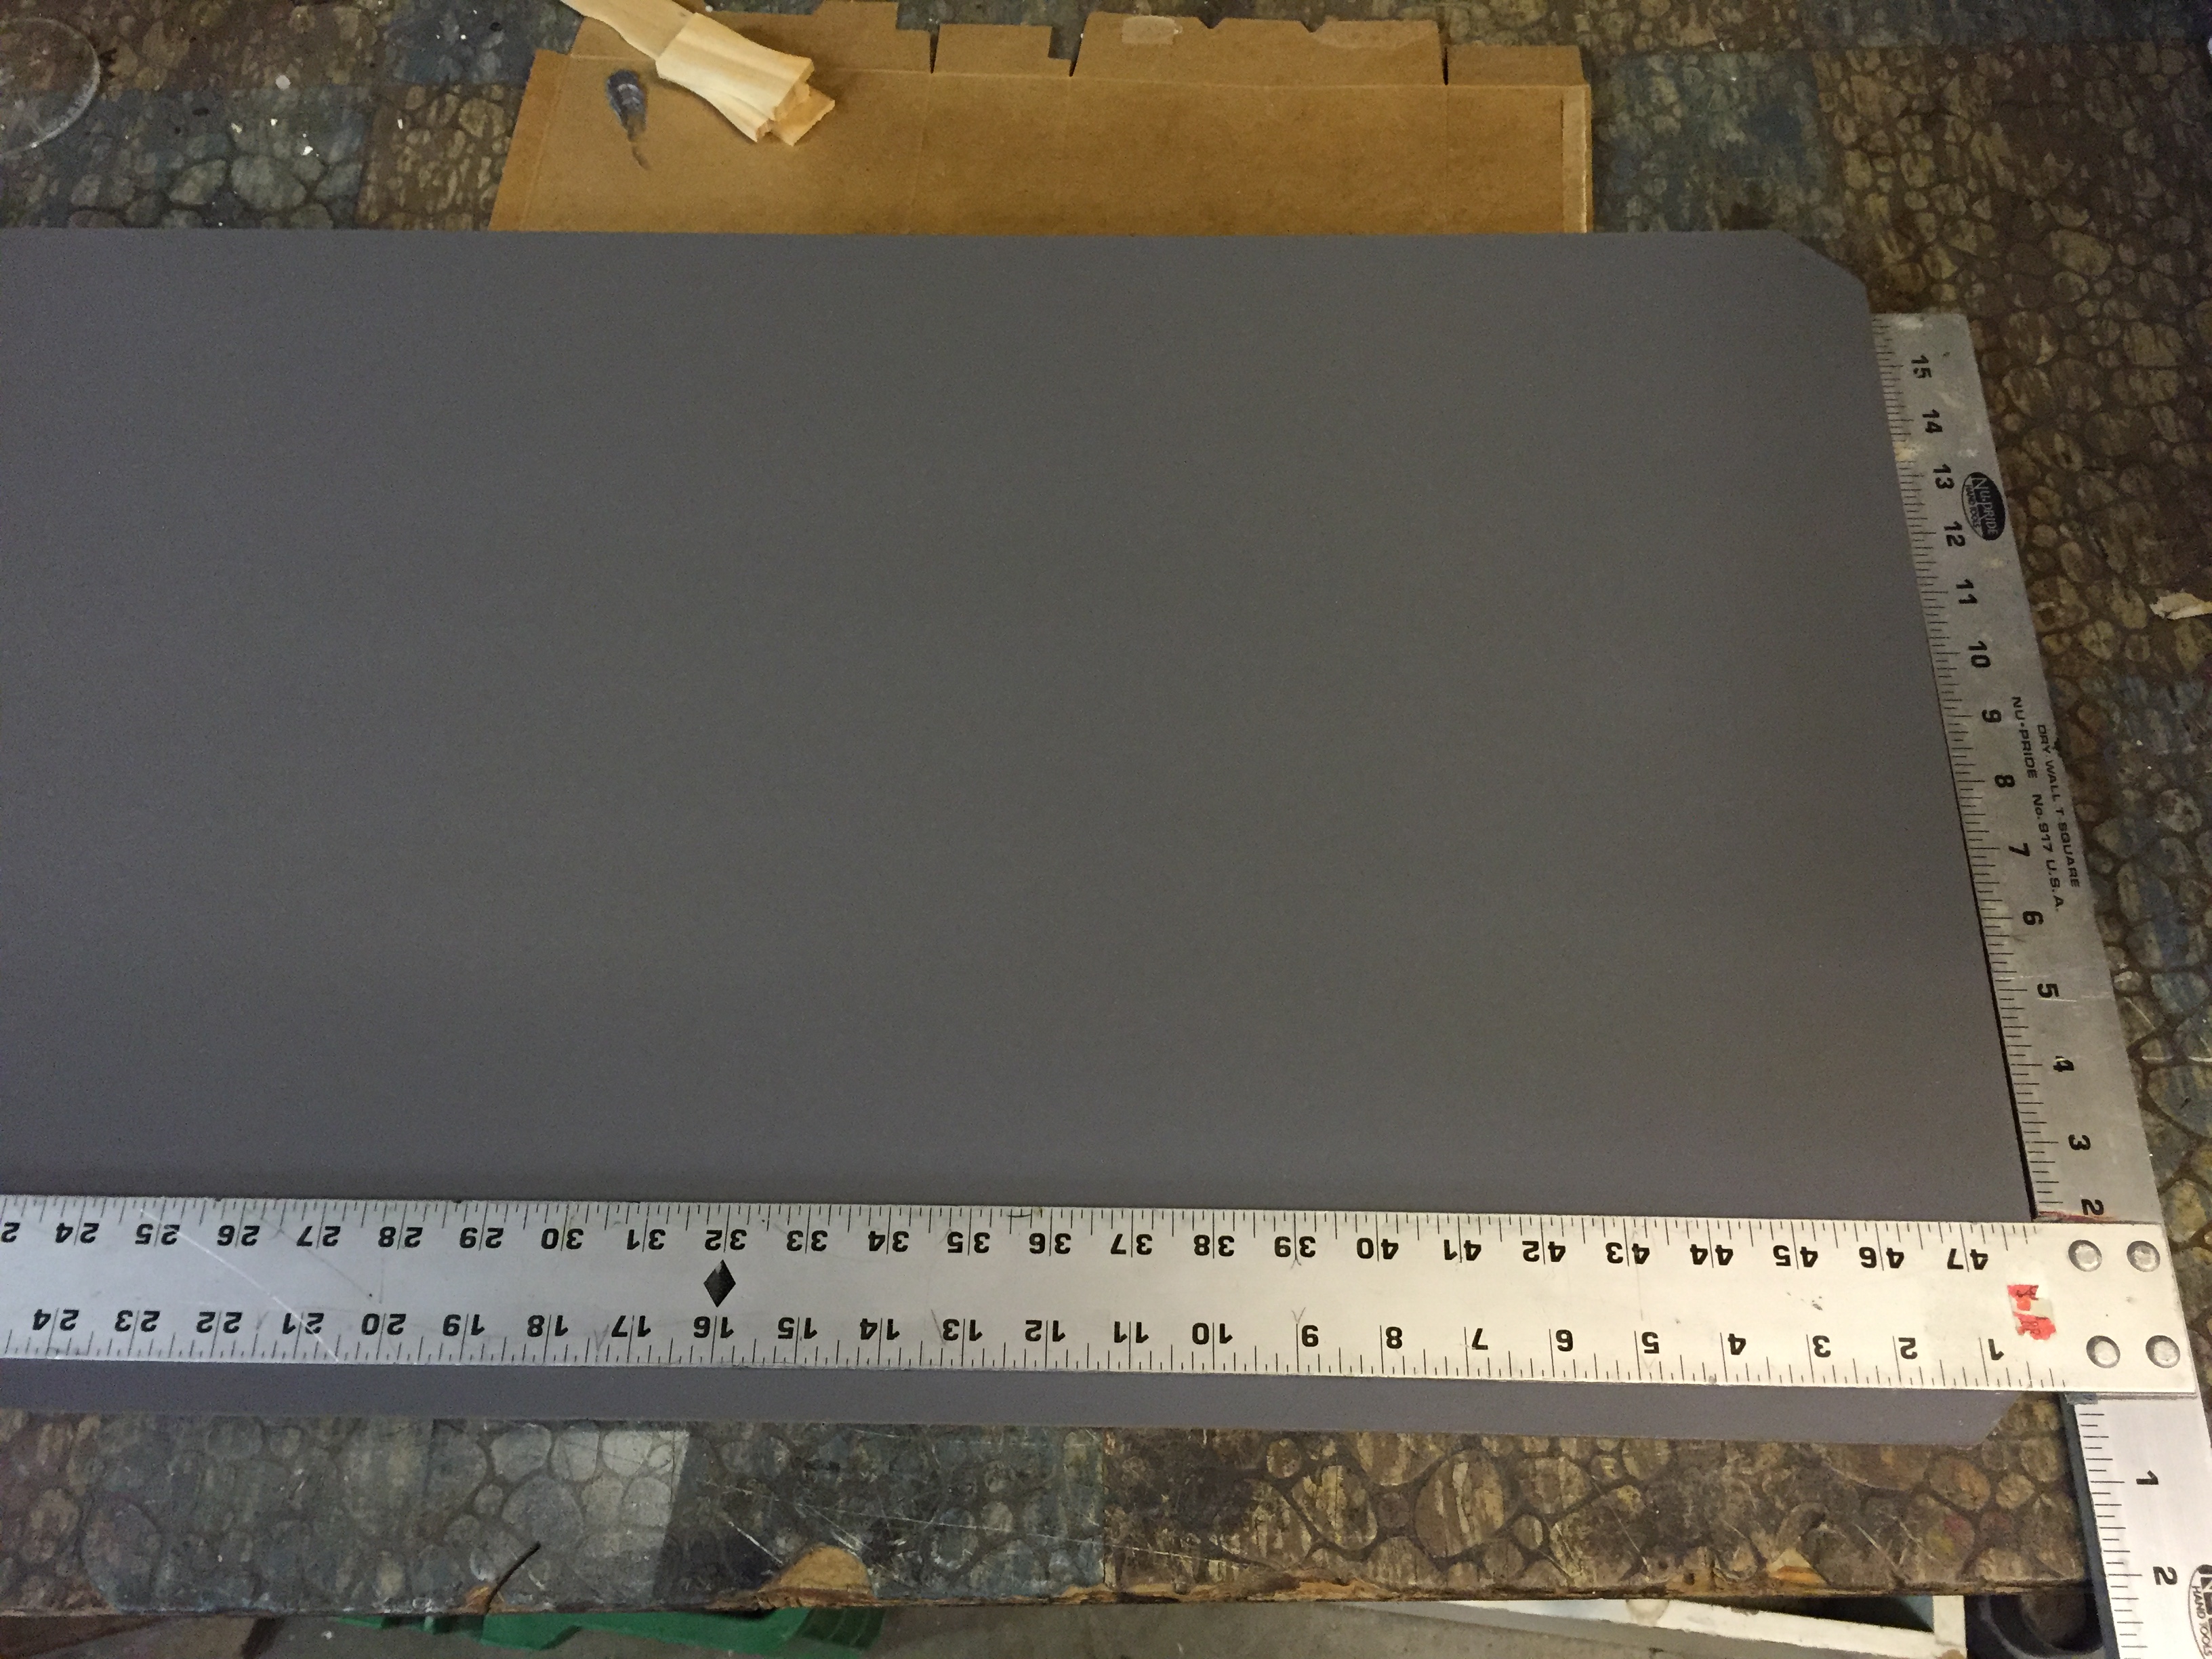
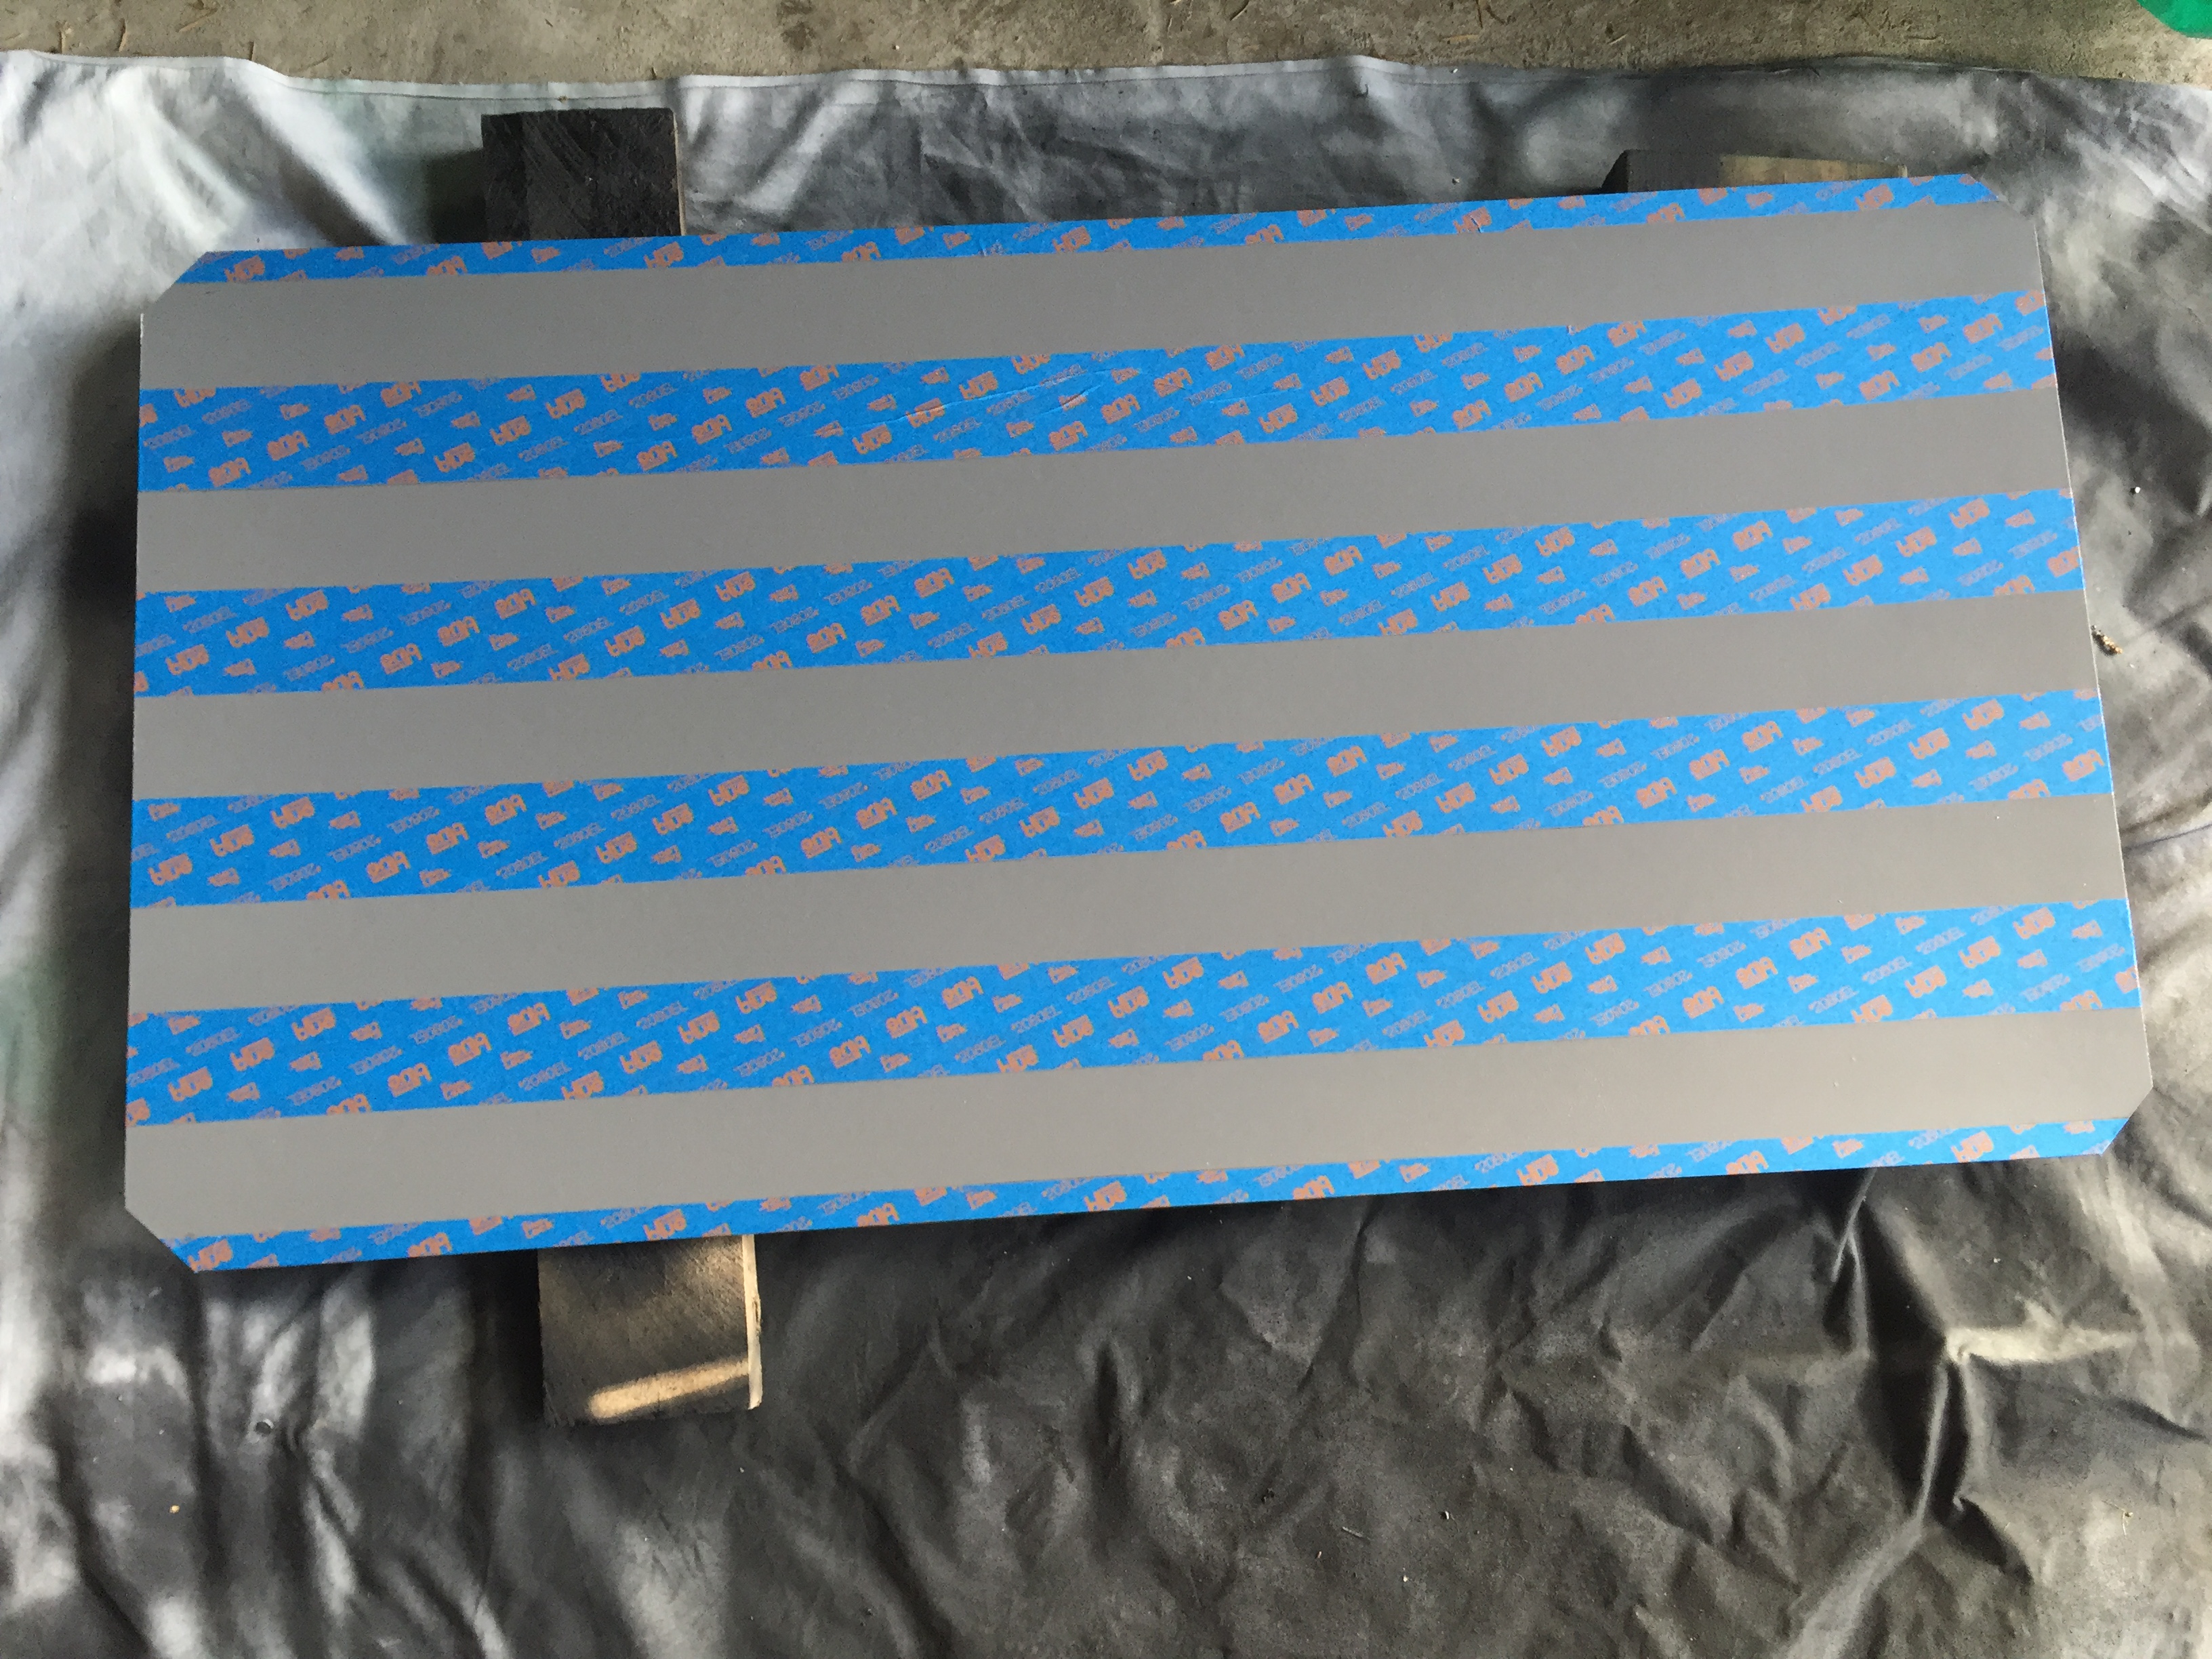
This is where you decide what type of design you would like on the bottom of your shelves. I wanted thick, bold stripes! So I measured off where I wanted the stripes to be (Starting in the Middle) and used a large square ruler to make sure they were even. And followed up with painters tape. I used the type designed for delicate surfaces because the grey had been painted the day before…..and it just so happened to be the only painters tape I could find in my dad’s garage. So it worked out perfectly!
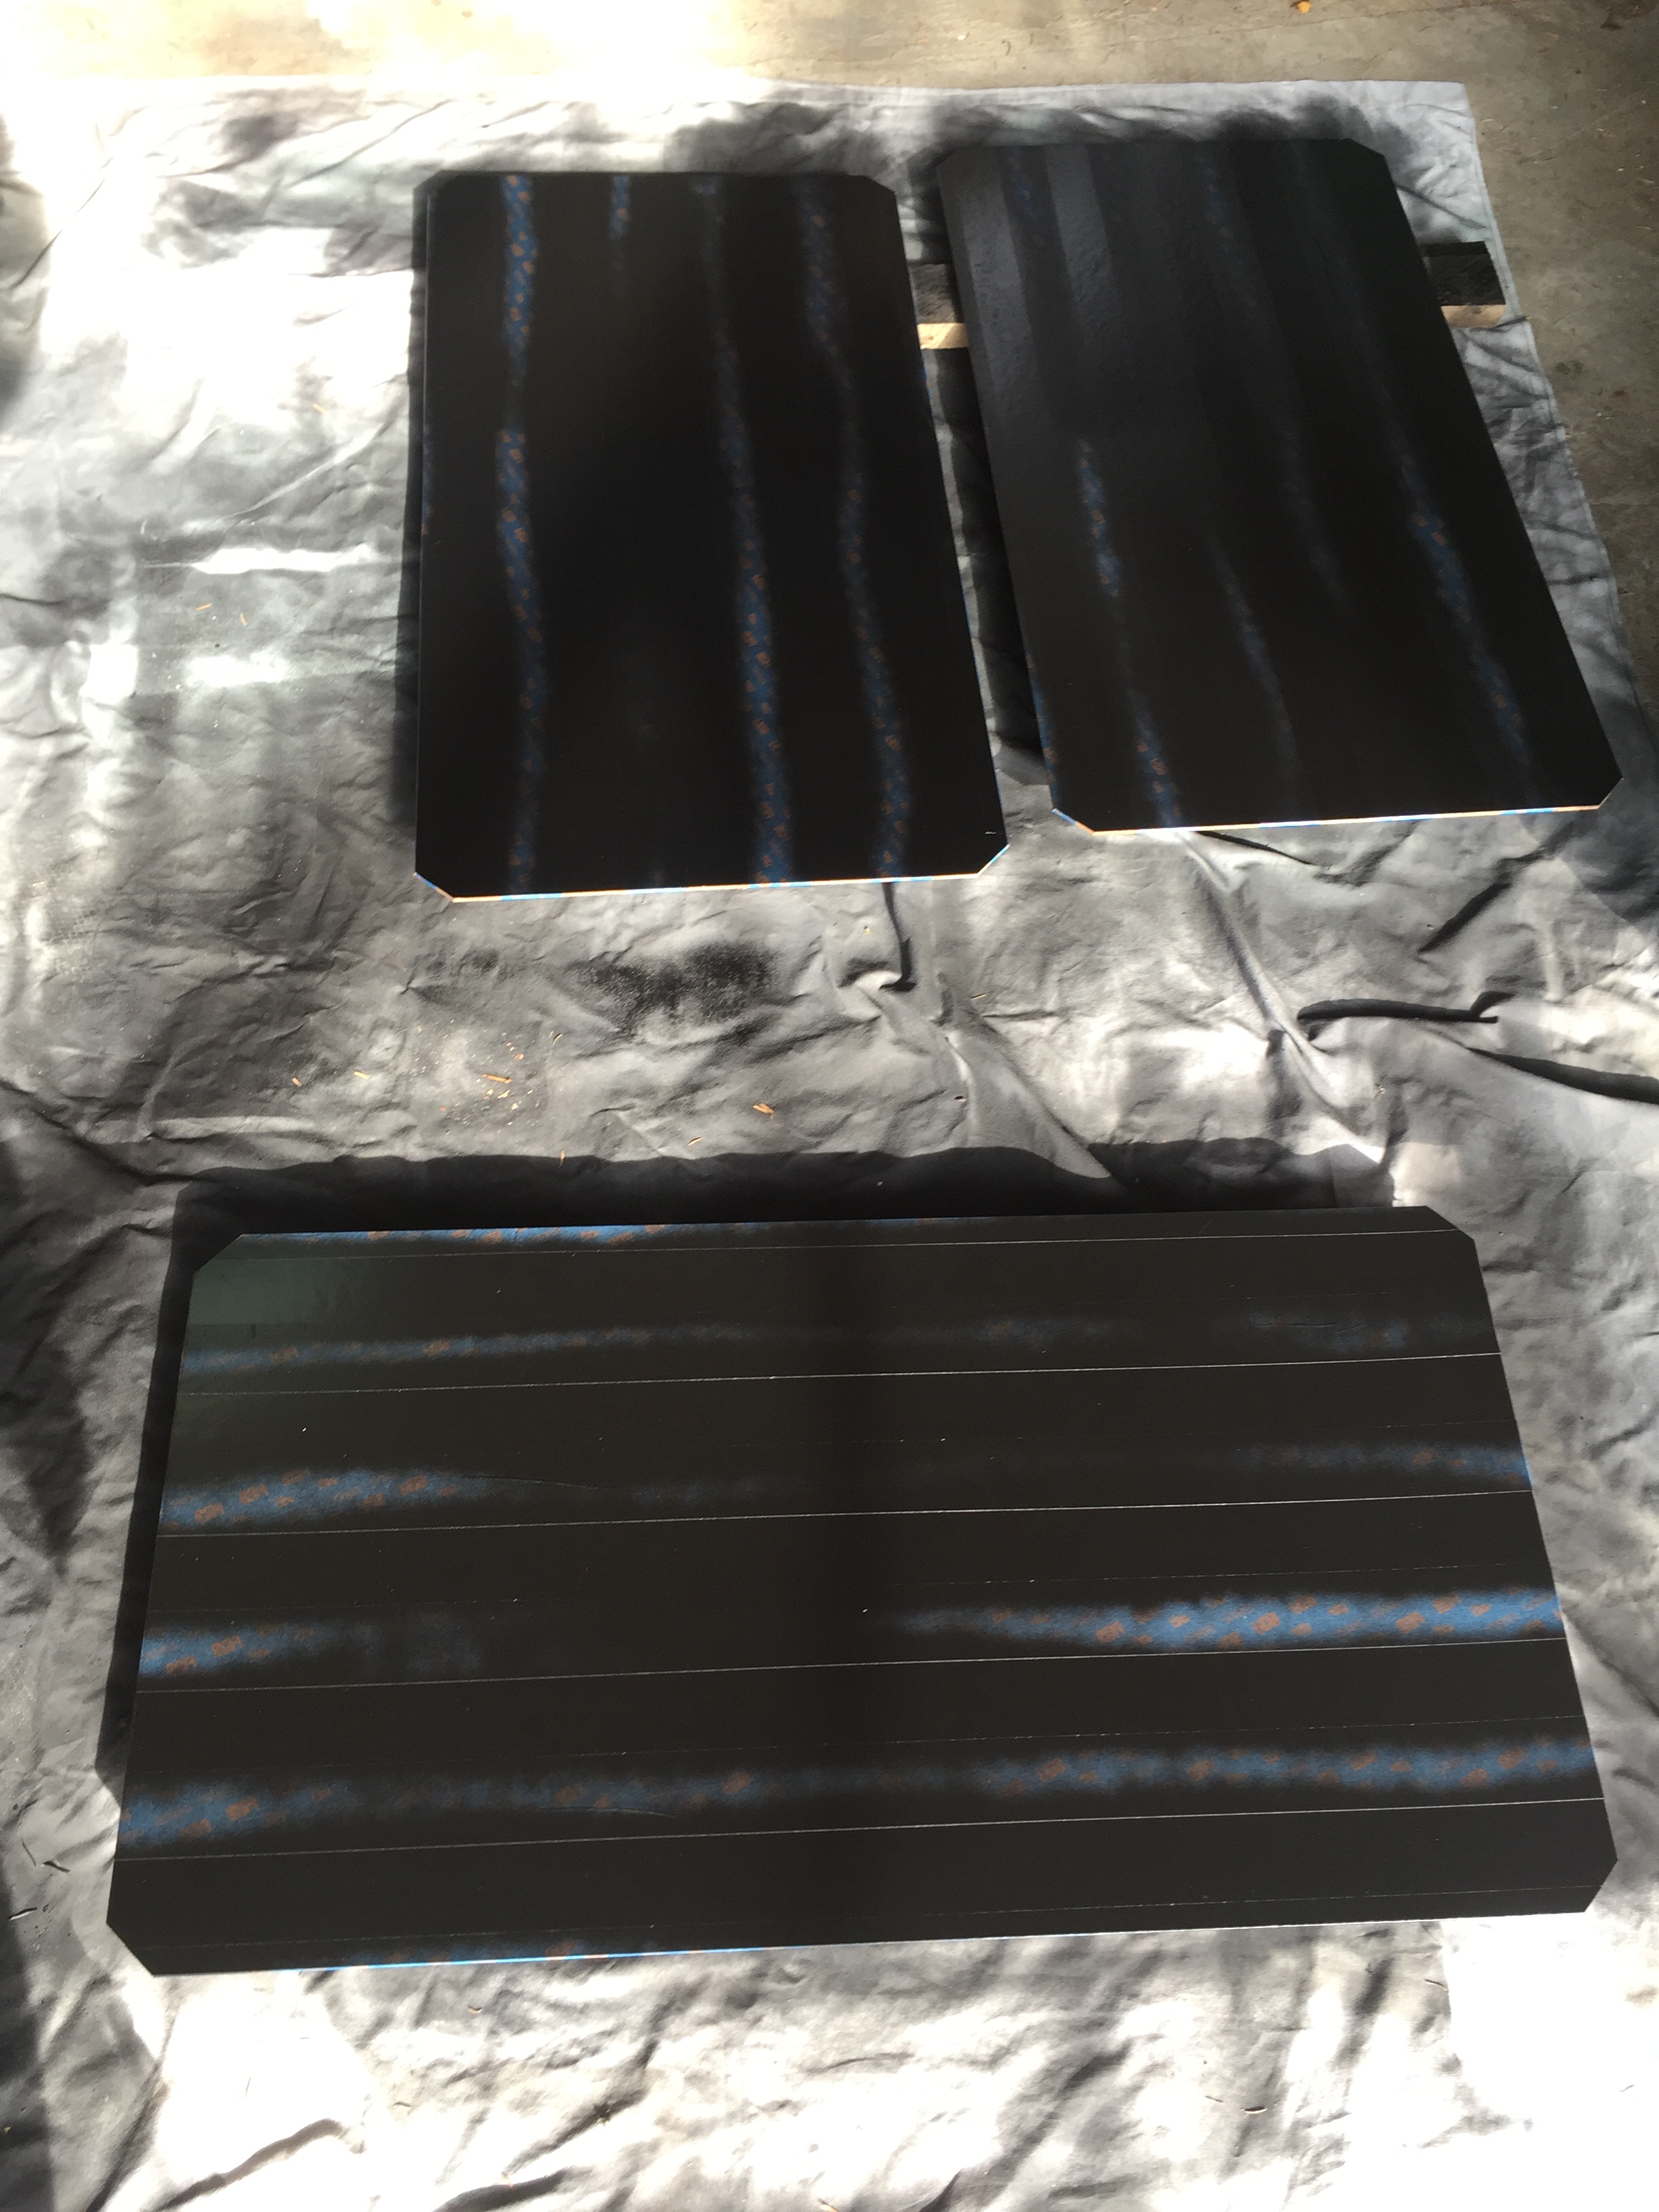
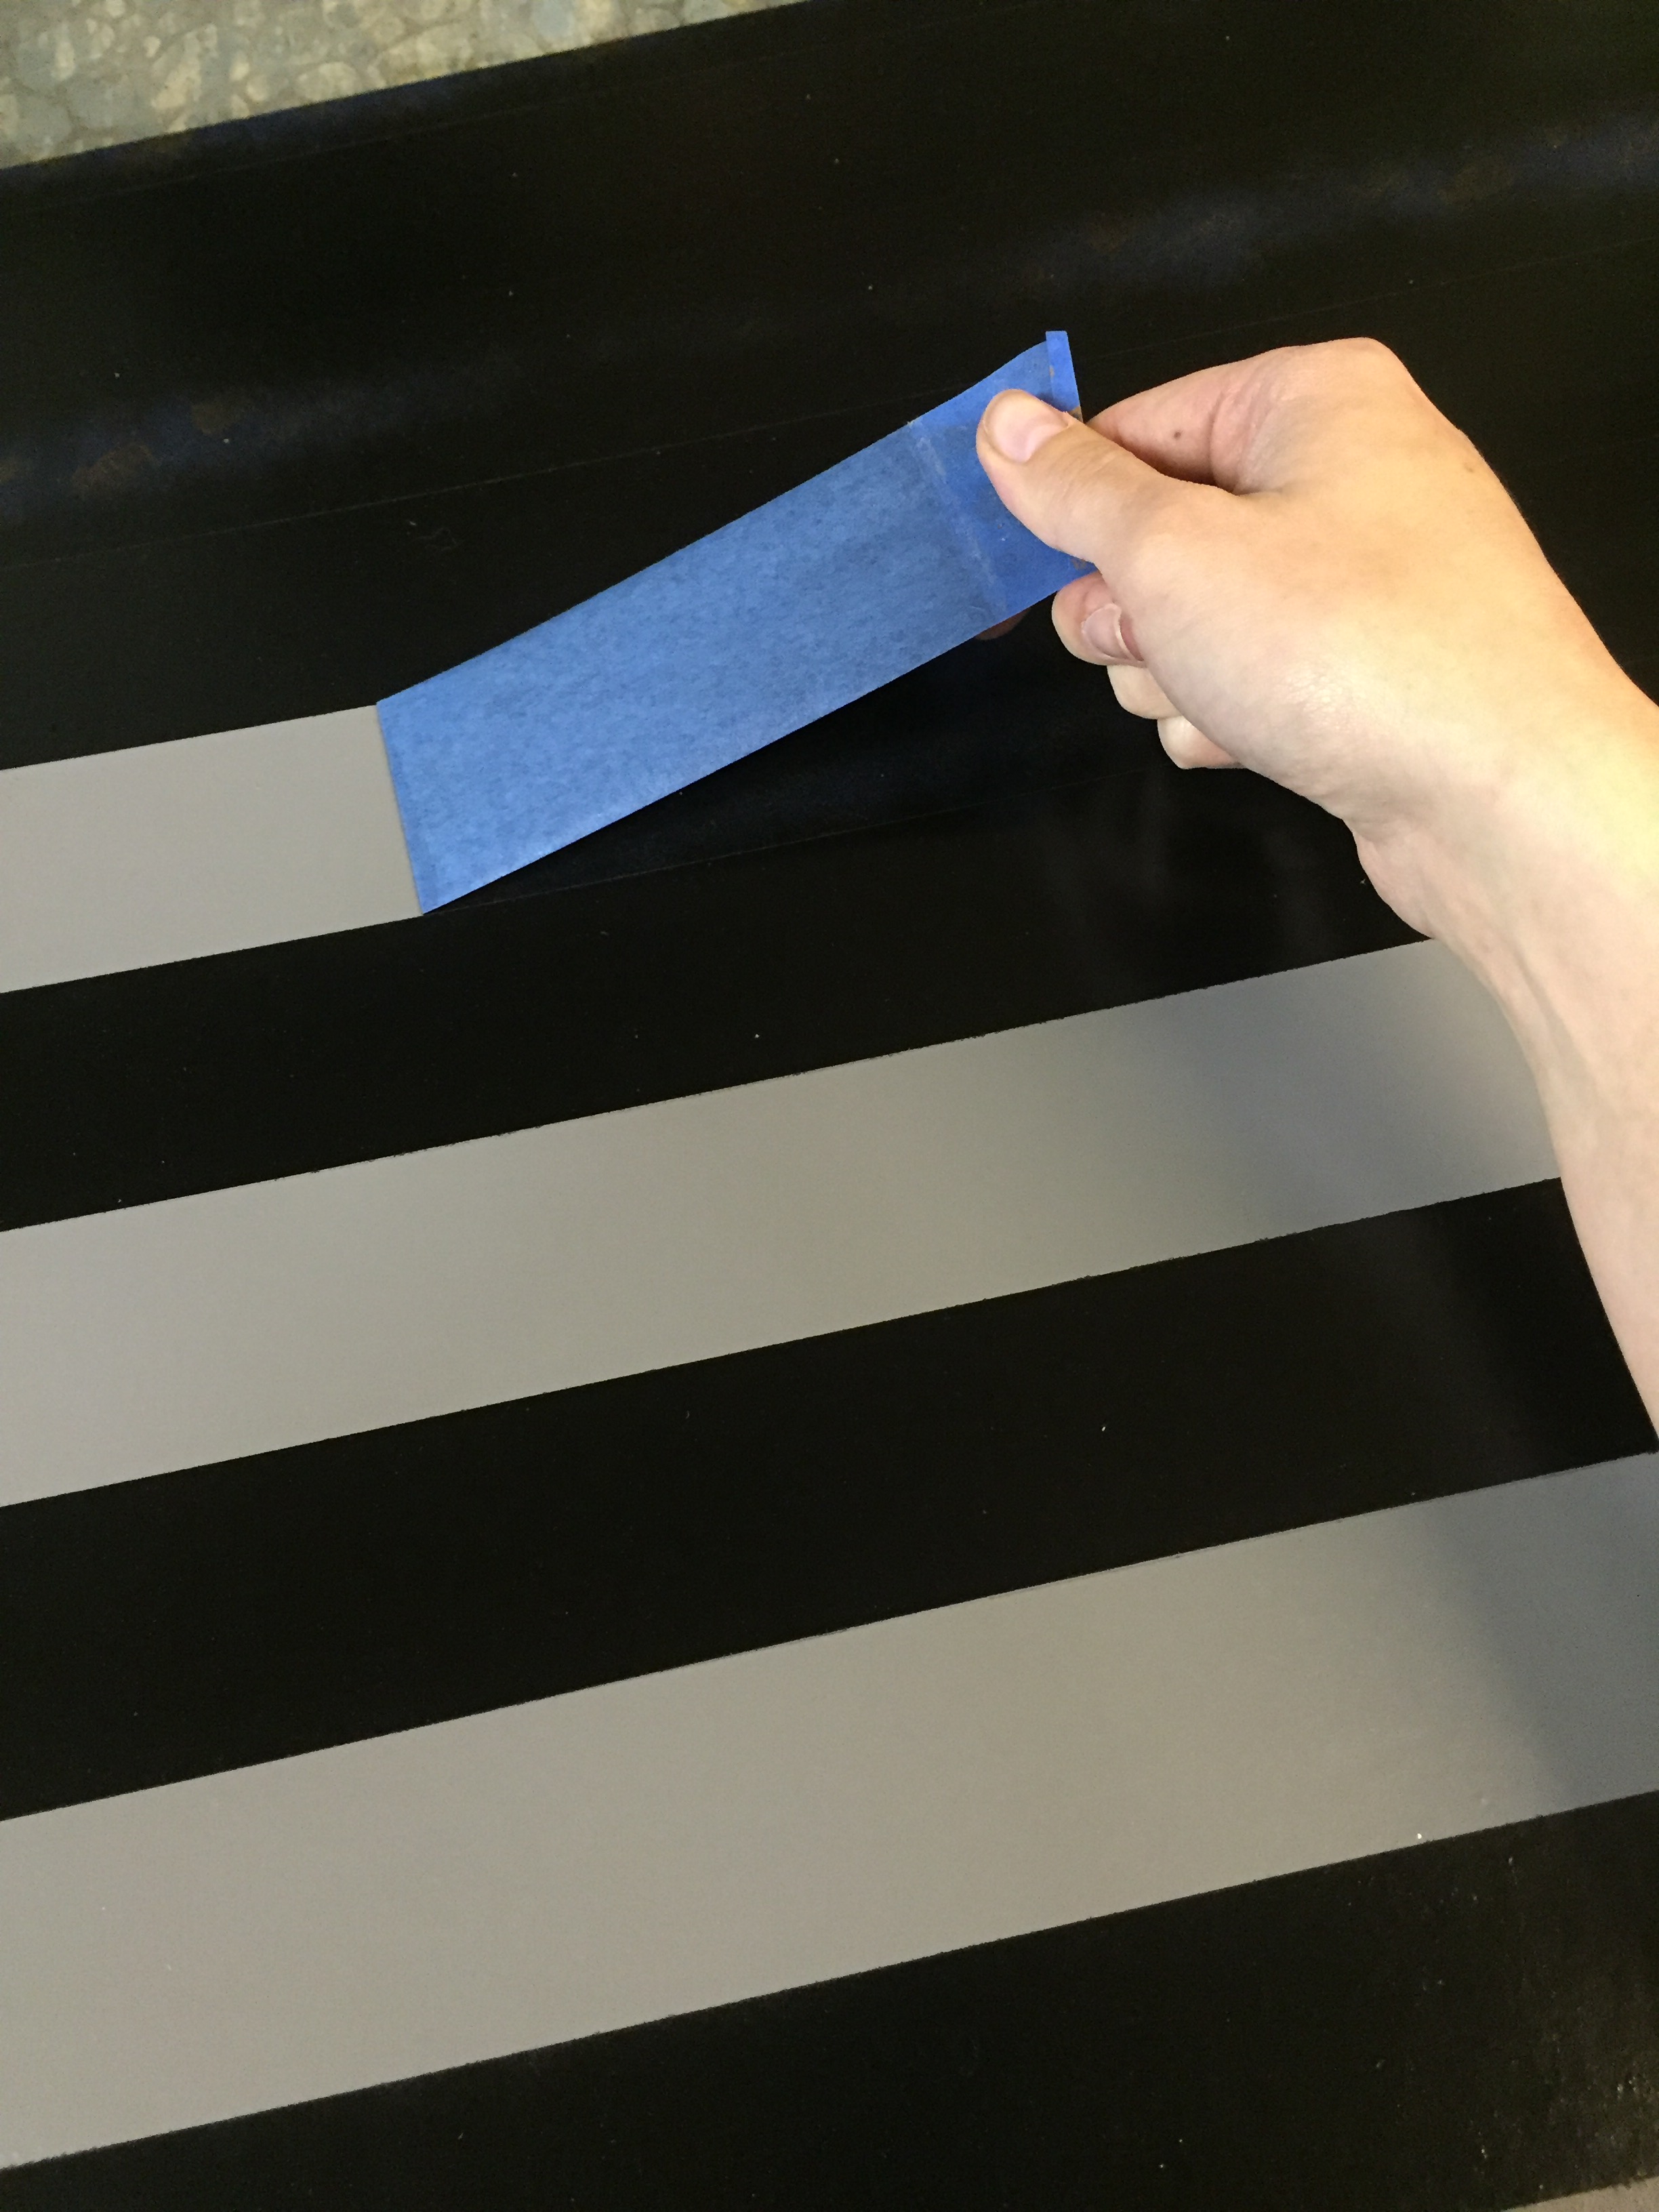
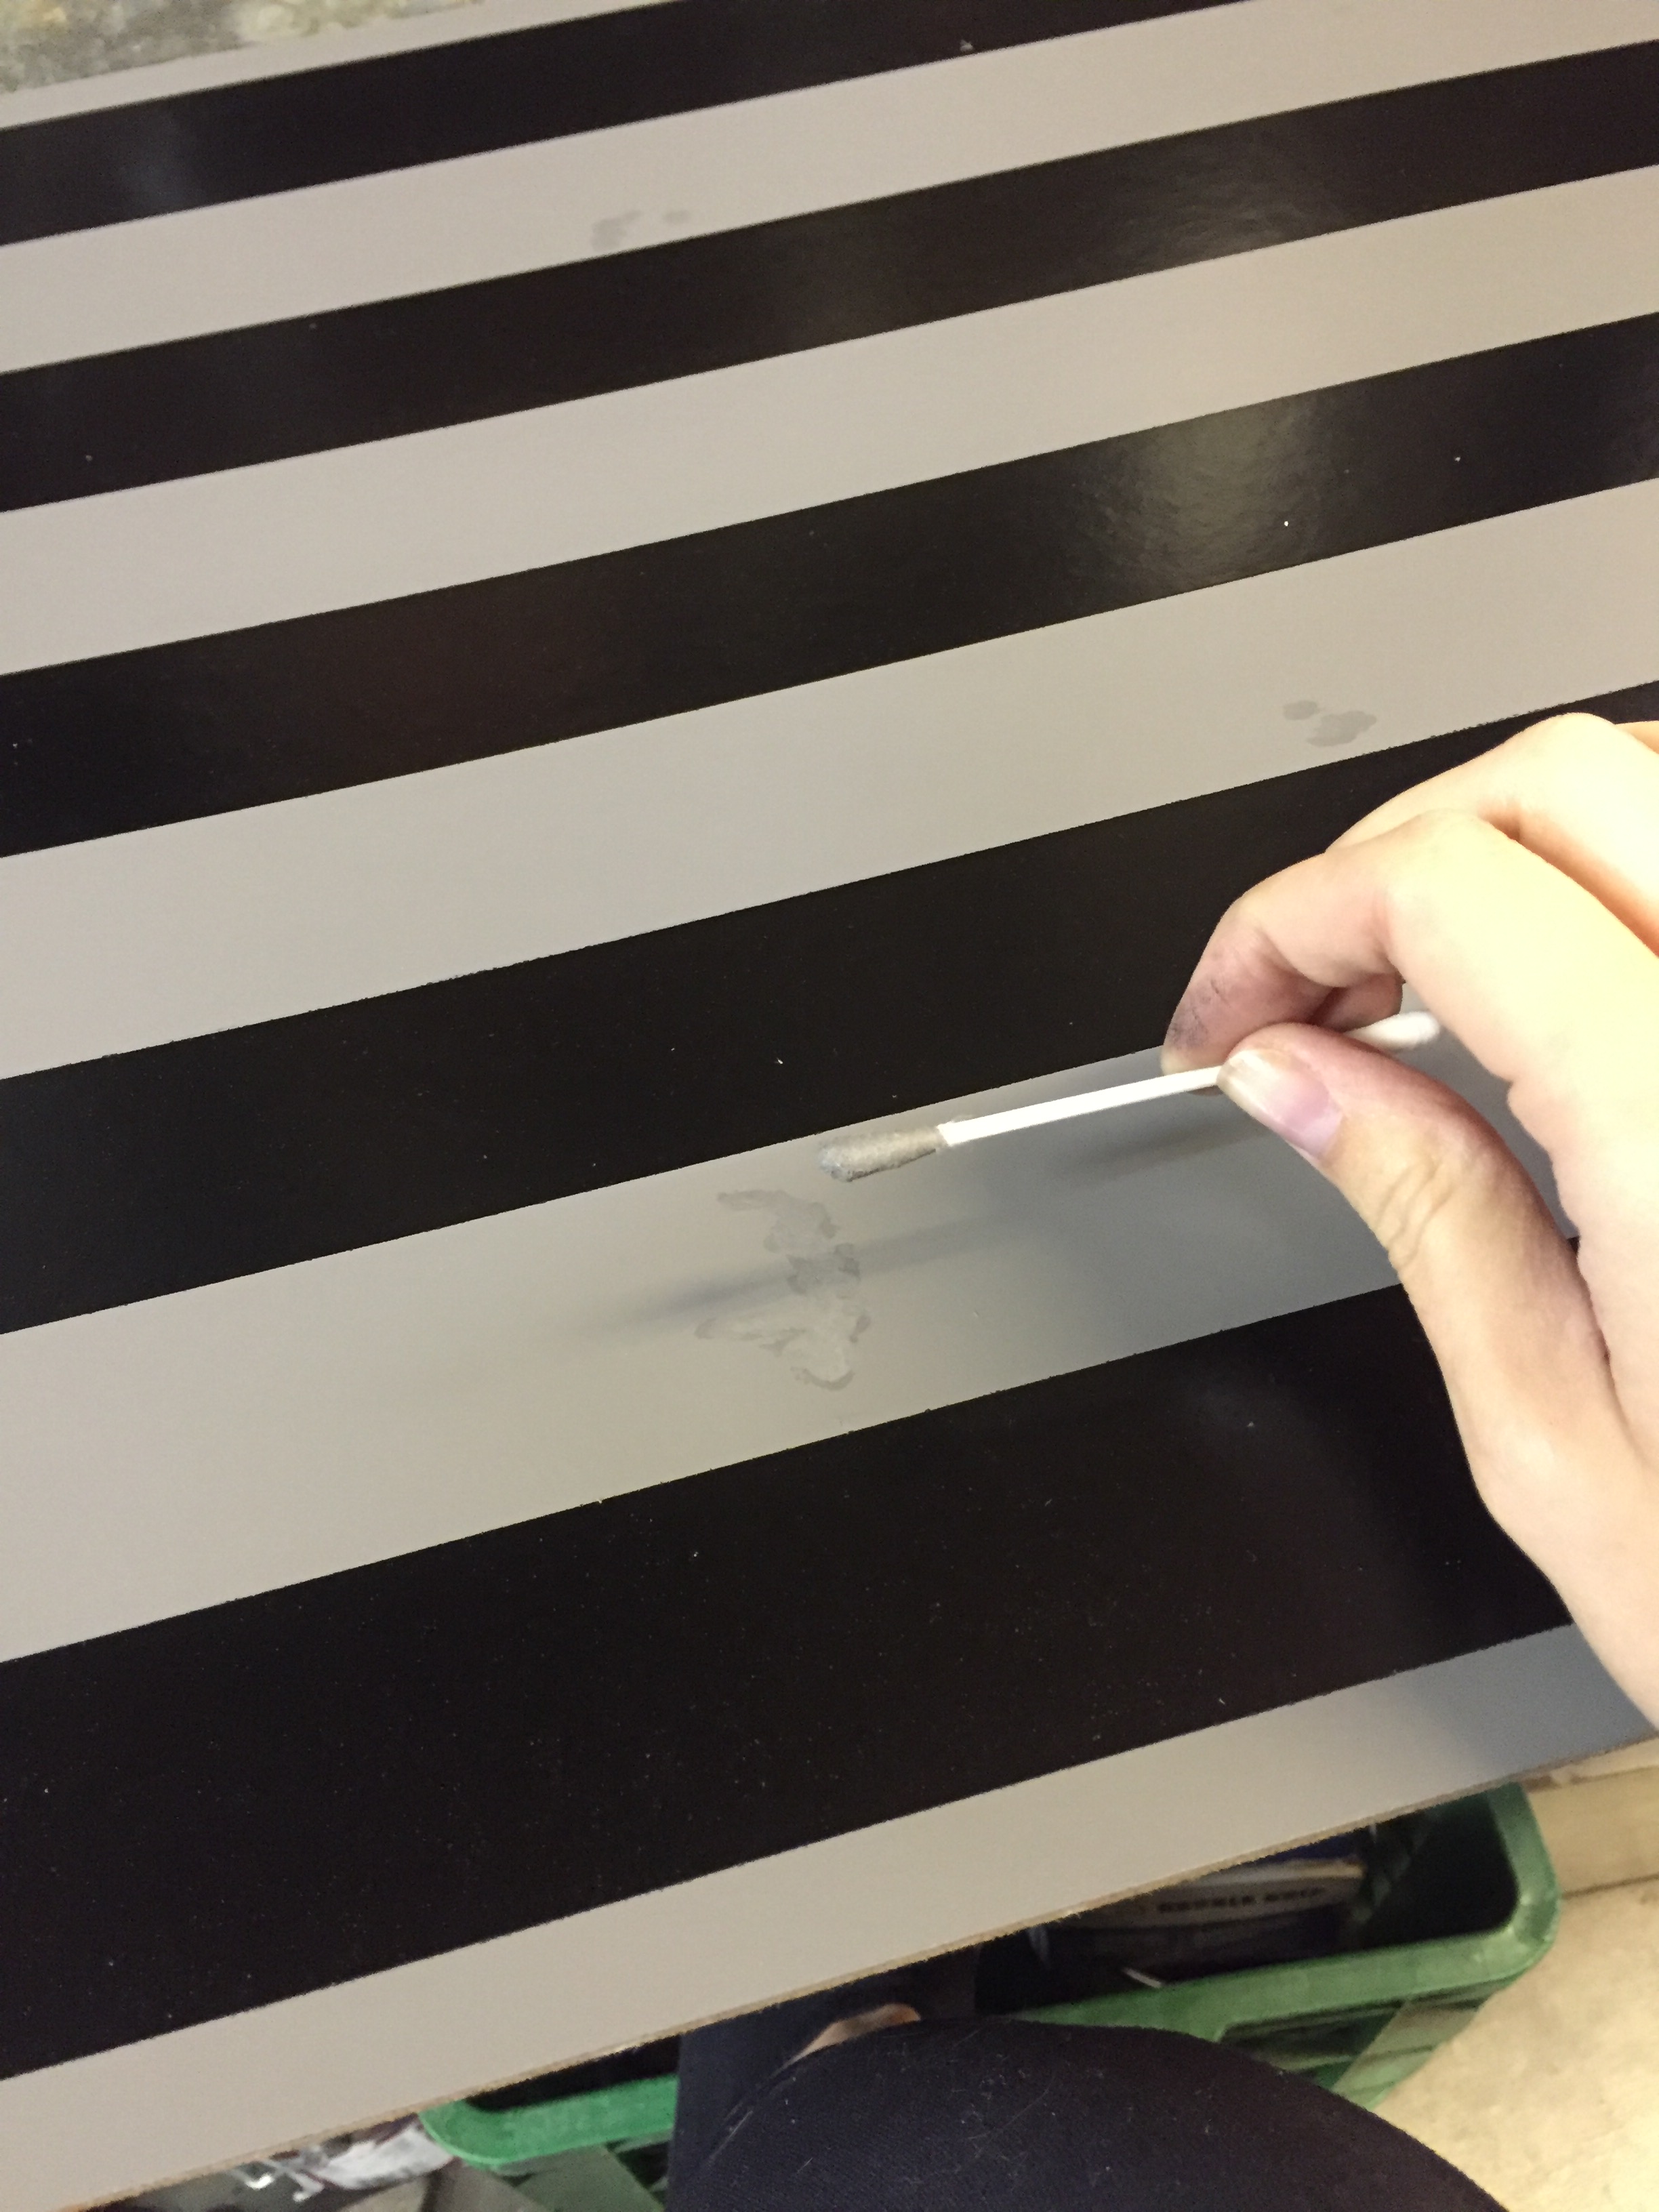
Once your tape or stencil is secure, you can paint over it with the first color. In this case, black. After the new paint has completely dried, remove the tape very slowly. And If any of the grey paint is ripped off in the process, just spray some more paint onto a paper plate, and use a Q-tip to patch the paint. And it’s perfect again! (Do a couple coats on the patch.)
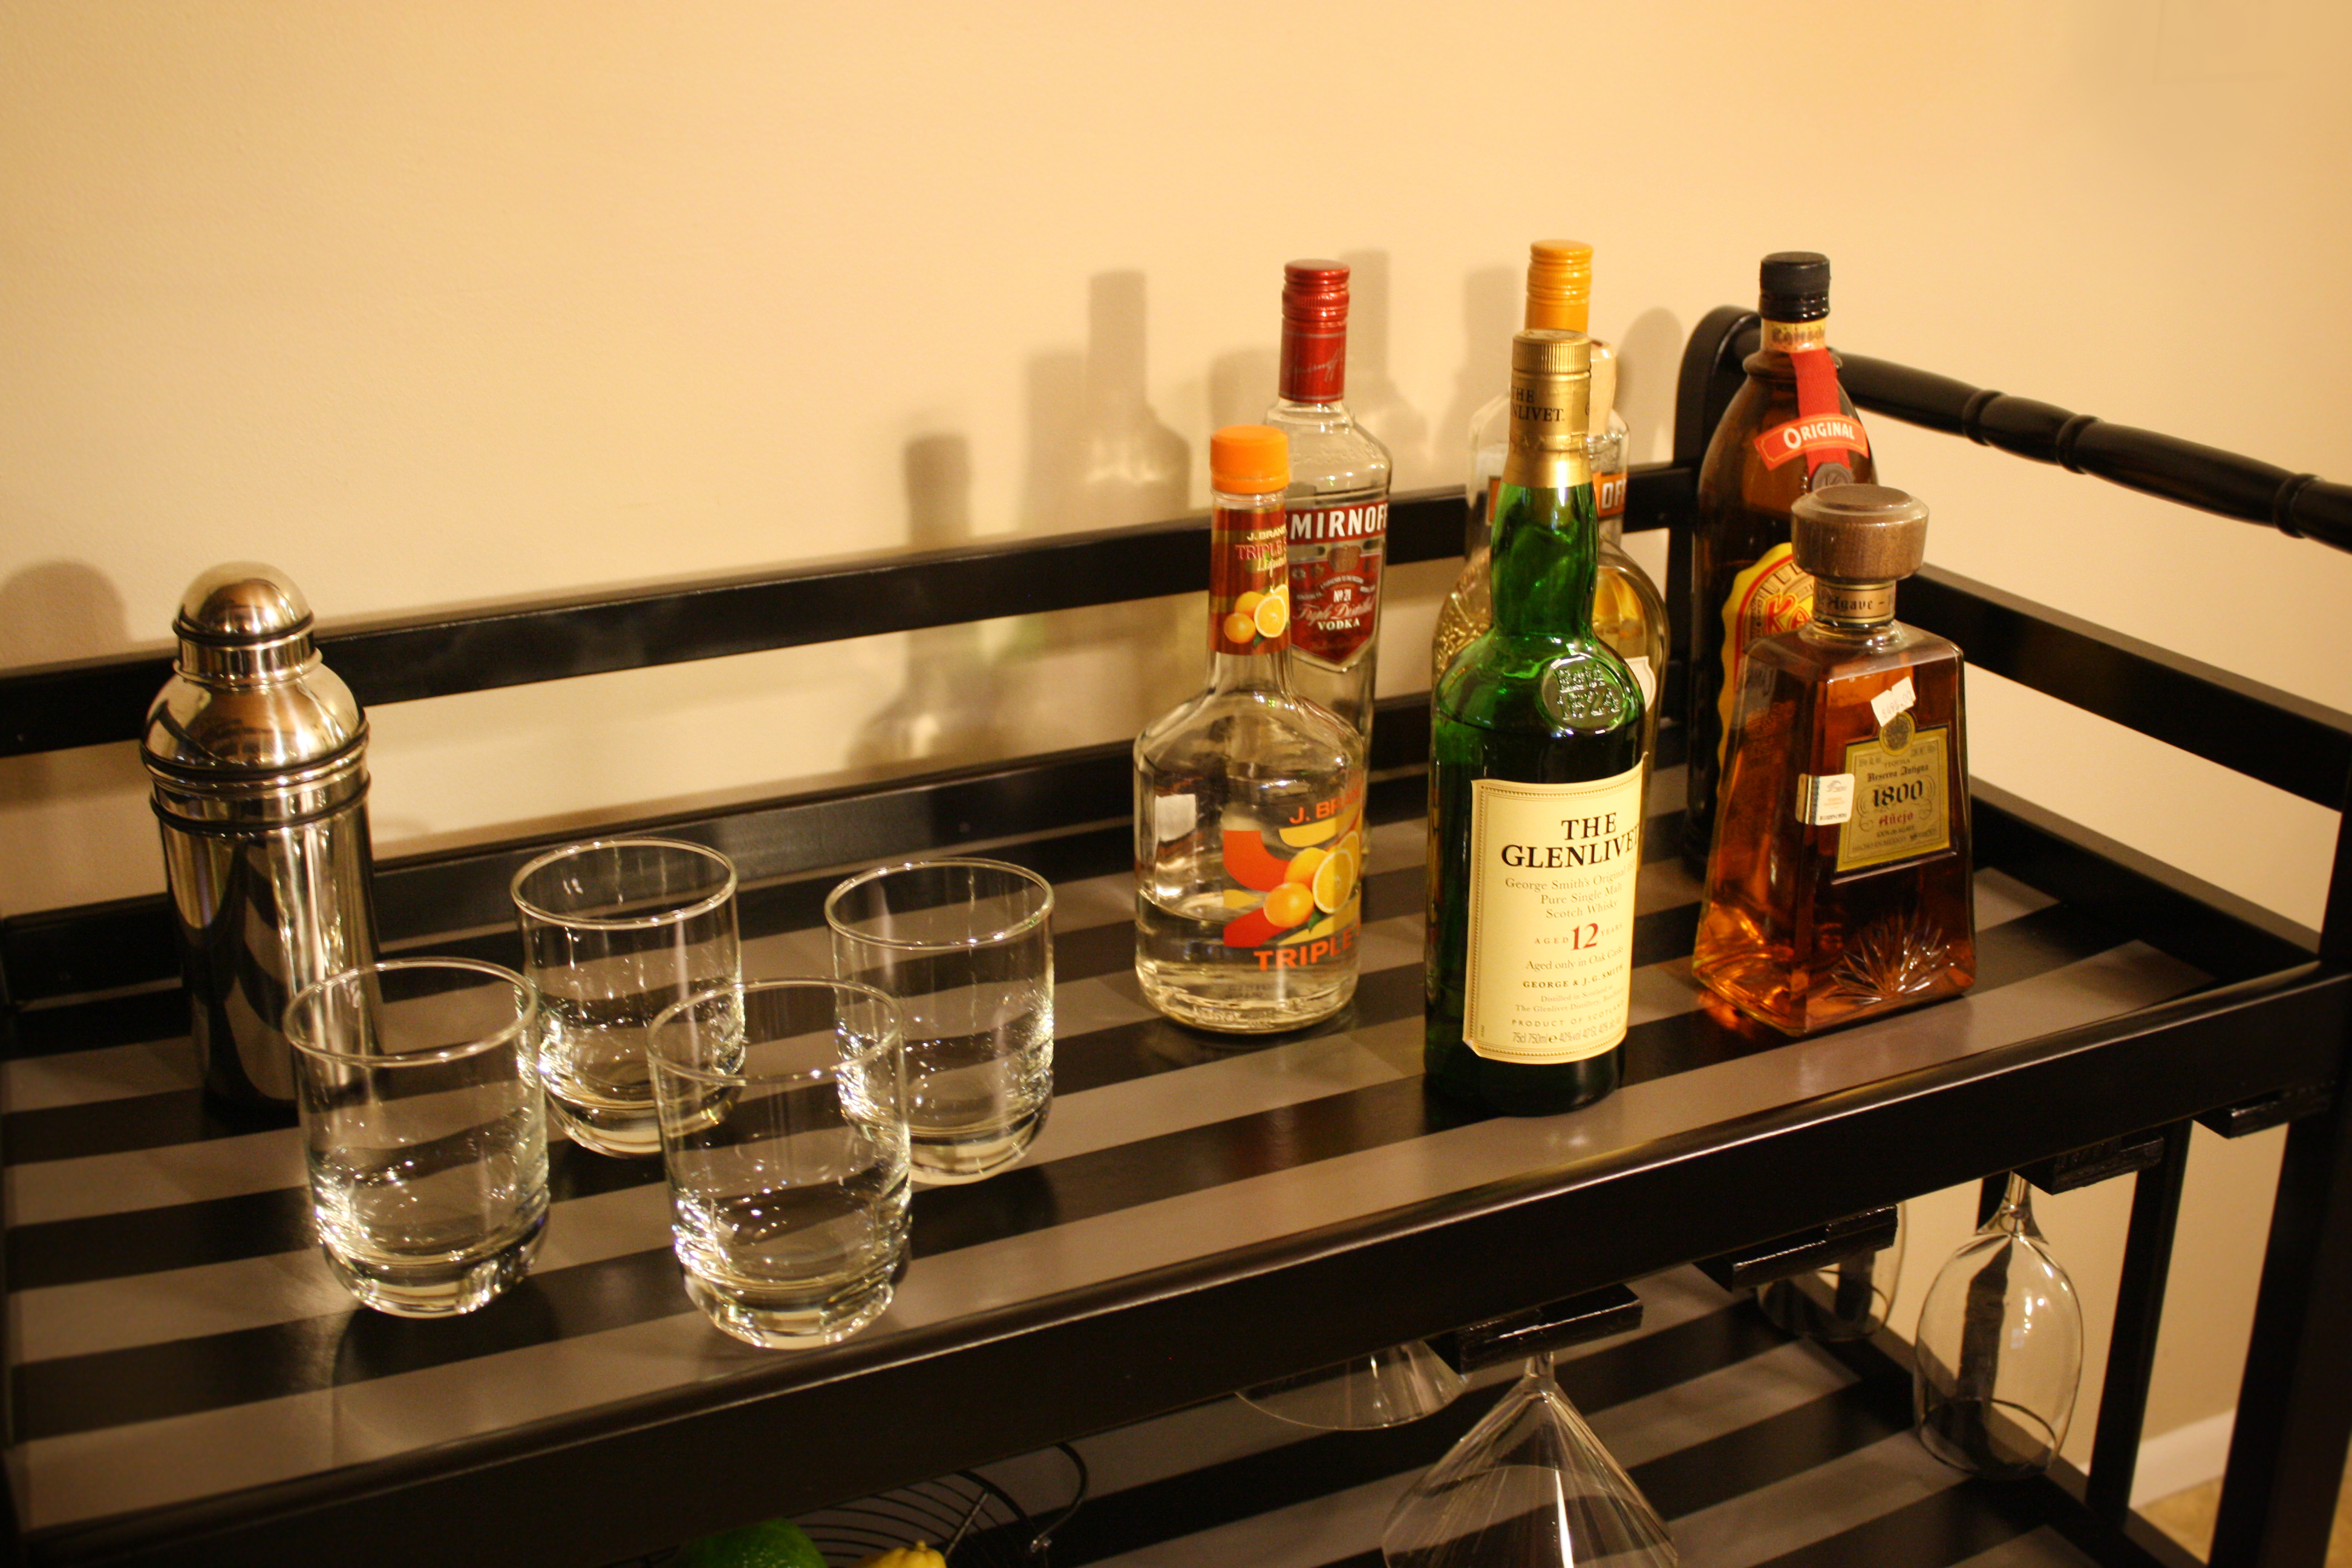
Once all the paint is dry, put all the pieces back together. (I hope you put all the screws in a safe place.) And your bar is ready for use. I also suggest letting the entire piece dry for a few days in order for the paint to completely set and not be sticky. The last thing you want is to ruin all your hard work!
Also, if you have small children, it might be a good idea to create your bar out of something that has doors, like a cabinet or hutch. That way you can keep the alcohol locked and out of sight.
But in this case, I think a changing table made for a fabulous bar! And if you’re interested in this fabulous makeover, it will be up for grabs in my FOR SALE TAB. Or send me an email at SalvageSeattle@yahoo.com if you’d like to purchase it.
And as always, leave me a comment to let me know what you think below!
And hit subscribe or like us on FACEBOOK to never miss a tutorial!
TOTAL COST: $18.95 (5 cans of spray paint)
Total Items SALVAGED from the Inevitable Seattle Trash Day:
- Baby Changing Table
- Paint
- wood flooring
- Paint stir stick scraps
