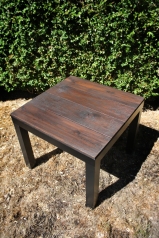
Hey guys! This new DIY project was super simple and turned out really great! And I’m stoked to share this DIY instructional post with everyone! I’ve had this boring black side table for about 3 years, and I originally got it at a thrift store for $10. Which was an awesome deal at the time! It’s super lightweight and the legs screw off easily. Below, you can see what the table looked like before this upscale project. To jazz it up, I wanted to add a nice wood top, and I love the way it turned out!
Let’s get this DIY started!
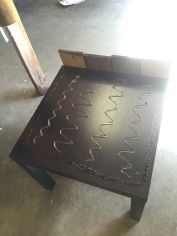
To the left is the “before” picture. As you can see, it was a very basic…kinda boring table. But, the table had given me some great use for three years. And although you can’t really see it in the picture, some of the top was warped from a plant I had on the table. I guess some of the water sat there too long.
But as times change, I felt it needed a upgrade. And I knew that I could provide a creative way to improve the appeal of the little table.
DIMENSIONS: 21.75 square inches (not quite sure how tall it is)
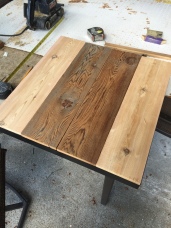
For this project, I found two boards from my dad’s wood pile that my dad identified as fence boards. They measure 5.5 inches wide. I used my dad’s table saw and cut 4 pieces to be 21.75 inches long. I made sure to make two pieces of both colors for the design I wanted. Although, this didn’t seem to matter when I applied the dark stain.
NOTE: Always measure twice before cutting!
CAUTION: If you do not have experience using an electric saw, please seek the help of someone who does. If you buy wood from Home Depot, they will cut it for you.
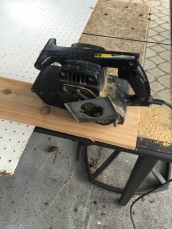
My next task was to sand each piece of wood so that you won’t get splinters every time you touch your table. I used an electric belt sander for the tops only! The sides, I sanded by hand with a sanding block because I didn’t want to effect the size of the boards too much. Since they were cut to fit perfectly, I didn’t want to screw that up. (My mom will be pissed to see that I worked on her nice patio table.)
***The above caution applies to belt sanders as well***
Once your boards are as smooth as you can get them, wipe them down with a damp cloth to remove any fine sawdust. Once they’re dry, it’s time to stain. I used two coats of the same old dark stain that my dad had in the back of the garage. As you can see in this picture, I used one old rag to apply the stain, and another to wipe away the excess. (This is the same stain I used for my wood pallet sign) SEE THAT HERE.
NOTE: If you only stain one side, your boards might warp or curl a little.
The last steps in this DIY project is to glue down the boards. I chose to use glue because I didn’t want to see holes from a nail gun, or the heads of screws. Sometime down the road, if the boards come loose, I’ll consider other options. The two adhesives I had on hand were a two-solution super glue that I had to mix together. (this is the clear border) And I used a dark brown painter’s caulk. Try to avoid the space that will be visible between each board. I wanted to make sure there was little to no division between the table and the new top, so I placed a bunch of clamps and paint cans on top of the boards. But you can use anything heavy. Then, I allowed this to dry over night.
And there you have it, a beautiful Table!
Items SALVAGED from the inevitable Seattle trash day:
- Used side table
- Scrap wood from an old fence
- illegible wood stain,
- Two types of adhesive
TOTAL COST: $0
Please leave any comments or questions below! Let me know if you try it out!


Kat this is great! You are such a creative lady. I’ve really enjoyed reading your blog posts so far!
LikeLiked by 1 person
Thanks Lisa!!! That means a lot to me! I’ve wanted to do something like this for a while, and I’m so thrilled to actually be jumping into it!
LikeLike