


Today, I bring a beautiful project to all of you! I finished this industrial shelf today, and I’m so pleased with how it turned out! I have to admit, I was a little ambitious with this project…needless to say, it turned out to be a bigger project than I thought it would be. And NOT just because it’s actually a super heavy shelf!
Also, It’s so weirdly bright out today that it was hard to capture the true color of the stain I used. But, it’s also extremely dark in my house. Which makes taking pictures inside even more challenging, because everything turns out with this awful yellow tint. So, here is a picture of the wood inside to give you a better idea…sorta.

Let’s get this DIY tutorial started!
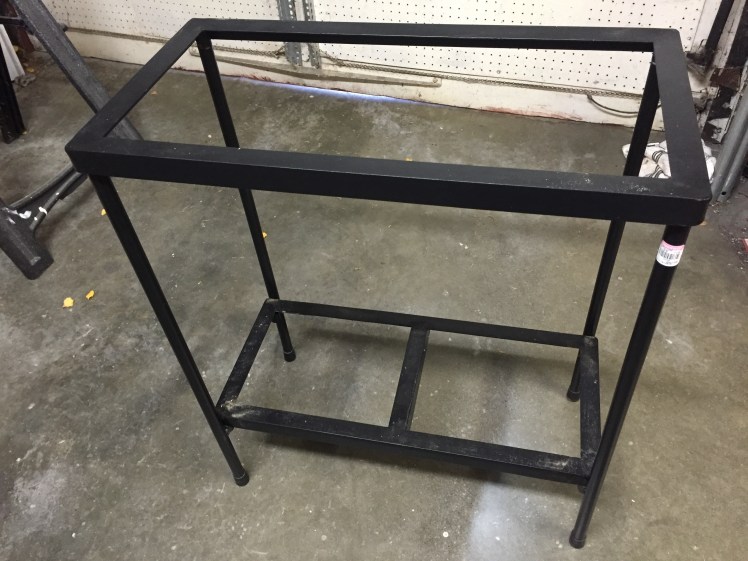
I found the remains of a metal shelf at one of my favorite thrift stores in Seattle, and I’m not sure what kind of a top it originally had, because there weren’t any indicators as to what held them in place. So, your guess is as good as mine. But, I knew that black metal goes really well with dark wood to create an industrial feel. And I figured adding the wood top would be easily achievable. I also happened to find this on a sale day, so instead of $9.99, I bought it for $5!


Once I had the metal shelf at home, it was time to scavenge through my dad’s wood pile. I was lucky enough to find some pieces that were all the same thickness. However, since the top and bottom shelves are different sizes, I had to step out of my comfort zone, because I knew that the chop saw wasn’t going to do all I needed for this project. It was time to learn how to use the table saw. I don’t know why it scares me so much. Perhaps it’s simply because it’s unknown to me. But a huge plus, is that the table saw that my dad owns, is actually a lot more quiet than the chop saw!
So here’s the deal. If you are like me, you NEED to seek the help of someone who knows how to use a table saw safely and correctly. This is a big reason why it took me so long to complete this project. My dad was simply unavailable. So I waited…and waited.
Once my dad was able to help me, I cut three pieces for the top and two pieces for the bottom. Make sure to cut them with an extra 1/8 inch in length to account for the sanding you will be doing. (which is a lot of sanding) The 4 smaller pieces shown above, are the pieces that will be holding my beautiful shelves in place! Each of them will line up vertically underneath the horizontal boards.
The picture on the right (above) shows how the boards will aline.


To secure each of the shelves in place, I wedged two cross boards underneath, and attached them. I did this by drilling wholes through the cross boards, and slightly into the top boards. Then followed by 1 1/2 inch wood screws. (picture below)
Make sure that your top boards are EXACTLY how you want them before drilling, because the screws will keep them there. You’ll want everything lined up perfectly.
NOTE: It would be helpful to use a clamp on both sides to hold the wood in place while you drill.

DO NOT SKIP THIS STEP: Make sure to label the wholes so you know which cross board goes on each side. Since I didn’t measure the screws to be placed even, this will help you aline your boards perfectly. The reason this step is important, is because you will be taking the boards apart again.
I’m not sure why I didn’t take a picture of the next step. But I will try to paint you a picture. Once you have all your screws in place, take them out. THATS RIGHT…take them out! As you disassemble your shelves, label the holes on the underside of the top boards so they match the labels on the cross boards.
Next, remove the metal shelf and set it aside completely. Then reassemble all the wood as if the metal shelf were still there. This will keep all your boards lined up the right way for sanding. I did this because I didn’t want to scratch the black paint on the metal.

Next, it’s time for sanding! you’ll need two types of sand paper. One harsh, and one light. First, sand the entire shelf with the harsh sand paper, concentrating on the sides to make sure every board becomes flush with each other. (This is why we added an extra 1/8 inch to the length of the boards)
Then, sand each shelf once more with the fine sand paper to make the wood as soft as possible.
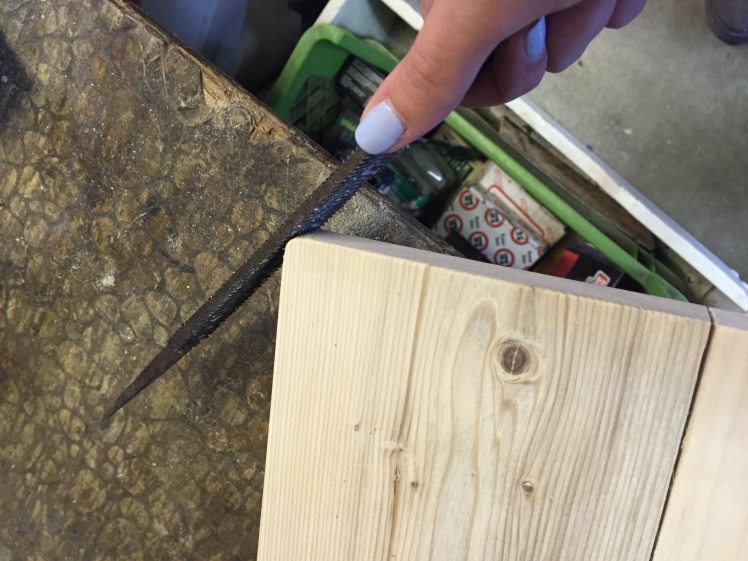
Since the metal shelf has rounded corners, I needed to round the corners of the wood as well. for this, I used a metal file. Do this delicately in order to prevent the wood from splitting. I promise…..you wont like the way that looks.
Then give each corner a fine sanding.


And of course, I used my favorite stain in the color “Kona” and I think it turned out absolutely stunning. When applying stain, make sure to use gloves and old clothing. (Peep the rubber gloves I chose to the right) This stain is very dark. So tread lightly! Apply one coat with an old rag and wipe it almost immediately with another clean cloth. If you don’t think it’s dark enough, THEN add another layer of stain.


Once your stain is dry (I recommend drying over night) you can put your clamps back in place to hold the boards in perfect alignment, then screw the cross boards back into place. This is when you’ll thank yourself for labeling each screw hole!
NOTE: When labeling the screw holes, make sure to press into the wood, so you’ll be able to see it later. The pencil will be covered up by the stain. And don’t worry about being able to see the labels later, because they’re on the bottom.

I completed the entire bottom shelf before moving onto the top, mainly because I wanted to make sure every step I took, would work. And once I put the bottom shelf into place, I was so overwhelmed by how good it looked! And I was even more than motivated to get started on the top shelf!


Overall, I was extremely happy with the way this shelf turned out! And I can’t wait to hear your feedback on it! As always, leave a comment and hit subscribe to never miss a project!
Also, LIKE US ON FACEBOOK!
Happy Upcycling!
TOTAL COST: $5
Total Items SALVAGED from the Inevitable Seattle Trash Day:
- Metal Shelf
- Wood
- Stain
- Screws
