As I’m working on the remodel of my parents home, I wanted to present them with something that they could display in the living room for all to enjoy. I knew that my dad had some old wood pallets laying around in the scrap wood pile, and I figured they’d be just what I needed to enhance the rustic feel of their home. Creating this showcase piece proved to hold a few challenges, but turned out to be extremely rewarding. My mother was touched by the display of their wedding date, and loved the distressed look of the sign.
Lets get this DIY instructional started!
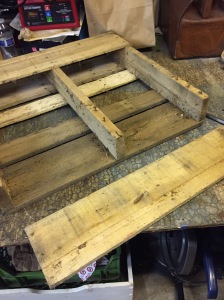
I started deconstructing the wood pallet with a hammer and a crowbar. I’m aware that you can actually just saw through the nails with an electric hand saw, but I couldn’t find my dad’s at the time. If you have access to one, I would definitely recommend going that rout. It will save you a whole lot of time and effort. After carefully removing each board, pick the best pieces from the lot to use for your sign. If you are going about this the hard way, like I did…..it is very likely that you will split some of the boards as you go along.
Your next step is to sand and stain the wood with a color of your choice. I used 150 grade sand paper because it was what I could find in the garage, and went over the wood lightly. This was mainly just to smooth out the wood a bit and get rid of anything that was hitching a ride on the old pallet. As for the stain, I used an old can I found in the deepest, darkest corner of the garage. It was so old, the label was not all that legible and it was nearly impossible to open. But since I wanted to avoid buying new products and wasting the old ones we already had, I went ahead with this dark color. Which turned out to be very luscious anyway. Score!
CAUTION: When staining, wear rubber gloves and use an old rag that you don’t mind turning the color of the stain. And of course, watch out for your eyes, nose, and mouth. Keep the stain away from them!
To secure the boards together, I placed two parallel boards along the back vertically. Then used a nail gun to secure each freshly stained board to the back panels. You might need to add more stain where the nails entered the wood.
(I nailed from the front of the sign)
One of the hurdles I faced with this project was releasing how difficult it is to make stencils by hand. The picture on the left was my original design. But after cutting out the first two words, I decided that the final outcome would still look great with a more simple font and wording. The picture on the right has the font that I ultimately decided with and of course, I put “Family” inside the “C” instead of “The Cheek Family.” The colors I used are the same colors we used throughout the house, a light Beige from the walls, and the flat white from the trim and ceiling. Come to find out later, the stain I used for the wood, actually matched the original stain on the ceiling beams in the living room. SCORE #2!
I love the end result of my wood pallet sign. And of course, reusing the old wood and products that would have otherwise gone to waste, is the cherry on top of this fun experience.
What will I cook up next?
Please leave a comment. I’d love to read your thoughts on this project. And if you try it out, I want to know what worked and what became a challenge.
Items SALVAGED from the Inevitable Seattle Trash Day:
- Wood Pallet
- Paint
- Screws
TOTAL COST: $3 (for the pack of blank stencils I used)


This is amazing!!!! I never got to see the finished project and I’m so impressed with how it turned out!!!
LikeLike
Thanks Kayla!! I’m so pleased with the final product! And I’m glad you like it!
LikeLike